

Welcome to part five of our AI Powered Christmas Tree Series! The goal of this series is to serve as a guide for you to build your own AI powered Machine Learning Christmas Tree, thanks to the Arduino Portenta X8 SoM and Edge Impulse AI Platform.
In this tutorial, we will be continuing to modify and extend the Linux microPlatform™ (LmP), this time with new recipes to enable an MQTT broker. Before jumping into this entry, be sure to check out the [previous blogs in the series](AI Powered Christmas Tree Series), especially our guides to the Yocto Project and Adding a Static IP to the LmP.
Adding MQTT Broker to the LmP
The strength of the Linux microPlatform lies in its flexibility. You are free to customize the packages which are included in your Factory image. In this tutorial, we are going to be going to be doing just that. By the end, you will see just how easy it is to add packages to your image.
This customization will be incorporating the Mosquitto application to your Factory image. Adding applications to a Yocto Project build is relatively simple, providing that a recipe for it already exists.
Mosquitto Overview
Many of the most popular and easy-to use MQTT brokers are available as part of the OpenEmbedded framework. In particular, we are going to be adding the recipe for Mosquitto to the LmP, which is located in the openembedded/meta-networking layer.
Mosquitto is an open-source message broker that implements the MQTT (Message Queuing Telemetry Transport) protocol. It is designed to facilitate communication between devices or applications in a publish-subscribe messaging pattern. In addition to the mosquitto package, we are also going to need mosquitto-clients as this contains tools which we can use for testing. These are:
mosquitto_pub: This command-line tool allows us to publish messages to MQTT topicsmosquitto_sub: This enables us to subscribe to those MQTT topics and receive messages from the publisher
Prerequisites for Machine Learning Christmas Tree
This is the fifth entry in our AI Powered Christmas Tree Series; you should follow along with the previous blogs before continuing.
FoundriesFactory Instructions
The meta-subscriber-overrides.git repo allows you to customize the packages included in your Factory image. Similar to our demonstration on Adding a Static IP to your LmP, we will be interacting with recipes (identifiable by the .bbsuffix) to customize our Factory image.
Begin by cloning and enteringmeta-subscriber-overrides:
host:~$ git clone https://source.foundries.io/factories/<factory>/meta-subscriber-overrides.git/
host:~$ cd meta-subscriber-overrides/
Including Applications on Image List
The combination of the Arduino Portenta x8 SoM uses a slightly different Factory image, as is included in our partner program. Instead of adding packages to lmp-factory-image.bb, we need to add a mp-partner-arduino-image.bbappend file to append the partner image.
If you are using any supported device other than the Arduino Portenta x8, follow the instructions referring to lmp-factory-image.bb.
1 - Arduino Portenta x8 (Partner Factory)
The lmp-partner-arduino-image.bb file specifies the packages to be installed on the device image. Previously, we added a slight configuration tweak to an existing recipe via a bbappend file. In this case, we are adding a whole new recipe to the image.
To do this, create the file and add the content below, appending the CORE_IMAGE_BASE_INSTALL variable:
host:~$ vim recipes-samples/images/lmp-partner-arduino-image.bbappend
Add the mosquttio and mosquitto-clients packages to CORE_IMAGE_BASE_INSTALL. The end result will look like this:
CORE_IMAGE_BASE_INSTALL += " \
    mosquitto \
    mosquitto-clients \
"
And that is it! OpenEmbedded provides a tool to search layers and recipes. This will allow you to check which packages are available to include in your image.
2 - Most Other Devices (LmP Factory)
The lmp-factory-image.bb file is where you can specify additional packages to include in your LmP distro. To do this, open the file in your editor and find the CORE_IMAGE_BASE_INSTALL variable:
host:~$ vim recipes-samples/images/lmp-factory-image.bb
Add the mosquttio and mosquitto-clients packages to this list; the end result will look like this:
CORE_IMAGE_BASE_INSTALL += " \
    mosquitto \
    mosquitto-clients \
    kernel-modules \
    networkmanager-nmcli \
    git \
    vim \
    packagegroup-core-full-cmdline-extended \
    ${@bb.utils.contains('LMP_DISABLE_GPLV3', '1', '', '${CORE_IMAGE_BASE_INSTALL_GPLV3}', d)} \
"
And that is it! OpenEmbedded provides a tool to search layers and recipes. This will allow you to check which packages are available to include in your image.
Adding mosquitto.conf
The Mosquitto Broker configuration doesn’t allow external anonymous connections. To address this, we need to create a mosquito append configuration to install a special configuration file.
Create the following folder:
host:~$ mkdir -p recipes-connectivity/mosquitto/files/
Create mosquitto.conf:
host:~$ vim recipes-connectivity/mosquitto/files/mosquitto.conf

listener 1883
allow_anonymous true
Create mosquitto_%.bbappend to customize the mosquitto recipe, adding the configuration during the Yocto build:
host:~$ vim recipes-connectivity/mosquitto/mosquitto_%.bbappend

FILESEXTRAPATHS:prepend := "${THISDIR}/files:"
SRC_URI += "file://mosquitto.conf"

FILES:${PN} += "${sysconfdir}/mosquitto/mosquitto.conf"

do_install:append() {
    install -m 0644 ${WORKDIR}/mosquitto.conf ${D}${sysconfdir}/mosquitto/mosquitto.conf
}
Pushing the Changes
Add these files, commit your changes, and push:
host:~$ git add recipes-samples/images/lmp-*
host:~$ git add recipes-connectivity/mosquitto
host:~$ git commit -m "Adding Mosquitto"
host:~$ git push

Enumerating objects: 9, done.
Counting objects: 100% (9/9), done.
Delta compression using up to 16 threads
Compressing objects: 100% (3/3), done.
Writing objects: 100% (5/5), 420 bytes | 420.00 KiB/s, done.
Total 5 (delta 2), reused 0 (delta 0), pack-reused 0
remote: Trigger CI job...
remote: CI job started: https://app.foundries.io/factories/<factory>/targets/4/
To https://source.foundries.io/factories/<factory>/meta-subscriber-overrides.git/
   eb44f39..160617e  main -> main
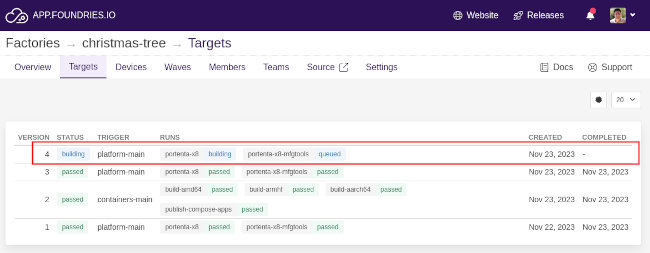
Follow your build on app.foundries.io in the Target page:
If you have not registered your device to the Factory, see: Registering Your Device.
Your device will download the new Target as soon as it is available. This behavior can be changed depending on your Factory/Device configuration.
Assuming you have not changed the default behavior, when the job successfully concludes, it will automatically update and reboot your device.
After rebooting, log on to your device and check if mosquitto is running with the following command:
device:~$ ps aux | grep mosquitto

mosquit+     620  0.0  0.1  10728  5744 ?        Ss   14:58   0:00 /usr/sbin/mosquitto -c /etc/mosquitto/mosquitto.conf
Testing MQTT Broker
Once you have the mosquitto broker running, a simple way to test it is to open two terminals connected to your device. In the first terminal, we will use mosquitto_sub command to subscribe to a publisher topic :
Terminal 1
device:~$ mosquitto_sub -t testTopic
This command subscribes to testTopic, and waits for messages. In terminal 2, we will publish a message to testTopic with the following command:
Terminal 2
device:~$ mosquitto_pub -t testTopic -m "Hello world!"
Now, if you switch back to Terminal 1, you should see the message Hello world! displayed, as mosquitto_sub is listening to "testTopic" , and prints any messages it receives:
device:~$ mosquitto_sub -t testTopic

Hello world!
This demonstrates the basic communication between a publisher and subscriber using MQTT on two different terminals.
Linux Tutorial Recap & Conclusion
In this tutorial, we covered adding a new recipe to LmP: the Mosquitto broker MQTT broker. With this package included in our LmP, we will be able to communicate with a MQTT switch module to control our Christmas Tree lights.
Continue Building Ai-Powered Christmas Tree
If you are interested in our entire 14-part series on how to build an AI powdered Christmas tree, browse through each section below. Each part brings you closer to mastering your build:
- Part 1: Your First FoundriesFactory AI-Powered Christmas Tree
- Part 2: Configure Network and Wi-Fi
- Part 3: A Yocto & Linux Tutorial for Building An AI-Powered Christmas Tree
- Part 4: Linux MicroPlatform (lmP) Config Tutorial for AI-Powered Christmas Tree
- Part 5: Modify & Extend Linux MicroPlatform for AI-Powered Christmas Tree
- Part 6: Using a MQTT Switch Module on Arduino Portenta X8
- Part 7: Creating a Shell Script Application and Adding to Linux microPlatform™ (MQTT)
- Part 8: Connecting the Web Camera Interface with Docker Container
- Part 9: Using Edge Impulse AI to Recognize Human Presence With Arduino Portenta X8
- Part 10: Enhancing the Image Detection Capabilities of our AI Powered Christmas Tree
- Part 11: Writing a Python App to Turn Our Christmas Tree On/Off Using AI
- Part 12: Creating a Docker Compose App to Automatically Power Your AI Christmas Tree On/Off
- Part 13: Running Docker Compose Application on a Raspberry Pi 4 to Power Our AI Christmas Tree
- Part 14: Managing Multiple SoM Platforms in the Same Factory