

Make sure your camera is mounted on /dev/video0, or replace the 0 according to your camera.
Welcome to part ten of our AI Powered Christmas Tree Series! The goal of this series is to serve as a guide for you to build your own AI powered Machine Learning Christmas Tree, thanks to the Arduino Portenta X8 SoM and Edge Impulse AI Platform.
In this tutorial, we will be continuing our development with the Edge Impulse AI Platform. This time, we will be making an enhanced detection model to run on our embedded device.
Before jumping into this entry, be sure to check out the previous blog entries. You can find a summary of each tutorial, and a sneak peek of what’s coming next on our project overview page.
Using Edge Impulse AI Platform + FoundriesFactory to Power your AI Christmas Tree
If you have been following along with our AI Powered Christmas Tree Series, you will now be very close to having everything you need to complete the project. There are only a few small pieces of the puzzle left to solve.
First, we need to enhance our detection model. Then we need to write a small Python app to handle sending the signal to turn the lights on/off. In the previous blog, we introduced you to Edge AI Impulse for developing a simple detection model to run directly on an embedded device.
In this tutorial, we will be expanding the model. and creating a more robust version, even better at detecting people!
It is worth mentioning that while the concept of an AI powered Christmas Tree might seem like just a bit of fun, the underlying skills and technology we have been utilizing in this project does translate to the ‘real world’. What we have covered in this series will help you make real products in the future, and by using FoundriesFactory®, you will have full control over the images and apps running on your embedded device—with the capability to update it anytime.
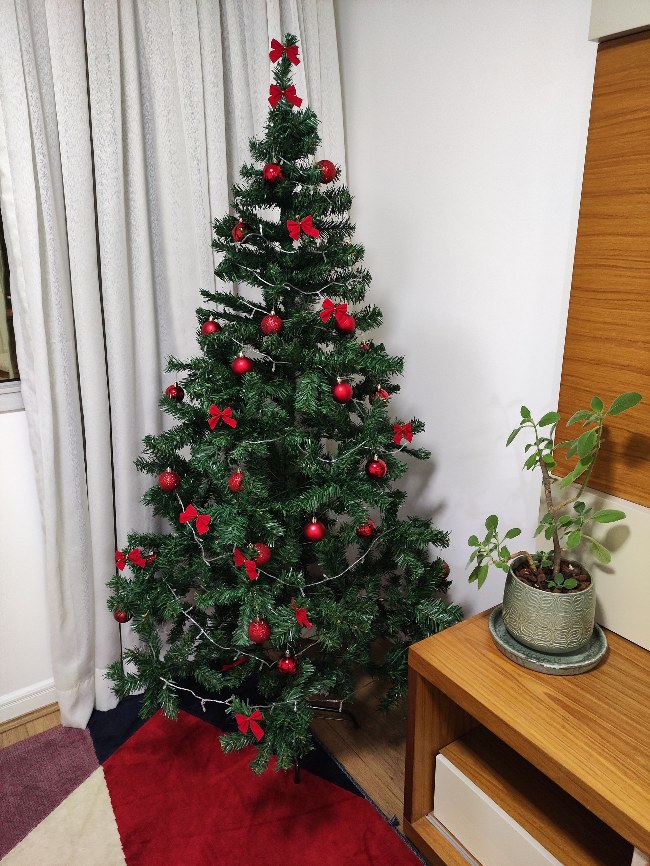
The only thing this tutorial does not intend to teach you is how to assemble your own Christmas Tree…however, mine is already set!
Prerequisites
This is part ten of our AI Powered Christmas Tree Series. Please ensure you’ve completed the earlier parts before continuing. You will also need:
- Edge Impulse account
Configuring your Edge Impulse CLI Container
Just as we covered in Using AI to Recognize Presence With Edge Impulse, you will need a container with the Edge Impulse CLI installed.
If you have not created the Dockerfile yet, create the following file on your embedded device, and copy the below contents into it:
device:~$ vim Dockerfile
FROM debian:bullseye-slim
ENV DEBIAN_FRONTEND=noninteractive

RUN apt-get update -y && \
    apt-get install -y --no-install-recommends \
    fswebcam \
    v4l-utils \
    wget \
    ca-certificates

RUN wget https://deb.nodesource.com/setup_12.x
RUN bash setup_12.x

RUN apt-get update -y && \
    apt-get install -y --no-install-recommends \
    gcc \
    g++ \
    make \
    build-essential \
    nodejs \
    sox \
    gstreamer1.0-tools \
    gstreamer1.0-plugins-good \
    gstreamer1.0-plugins-base \
    gstreamer1.0-plugins-base-apps \
    vim \
    v4l-utils \
    usbutils \
    udev \
    git \
    libatlas-base-dev \
    libportaudio2 \
    libportaudiocpp0 \
    portaudio19-dev \
    ffmpeg \
    libsm6 \
    libxext6 \
    python3-pip \
    python3-dev \
    python3-pyaudio

RUN pip3 install edge_impulse_linux -i https://pypi.python.org/simple
RUN pip3 install opencv-python six paho-mqtt

RUN git clone https://github.com/edgeimpulse/linux-sdk-python

RUN npm config set user root
RUN npm install edge-impulse-linux -g --unsafe-perm
Now build the Dockerfile:
device:~$ docker build -t edge-impulse .
After connecting the camera to your device, run the Docker container image:
device:~$ docker run -it \
           --network=host \
           --device-cgroup-rule='c 81:* rmw' \
           -v /dev/video0:/dev/video0 \
           -v /run/udev/:/run/udev/ \
           -v /var/rootdirs/home/fio/image/:/image/ \
           edge-impulse
Inside the container, run edge-impulse-camera-debug to begin testing the camera. The suggested URL will show a live feed of your camera:
device-docker:~$ edge-impulse-camera-debug


[GST] checking for /etc/os-release
[SER] Using camera C922 Pro Stream Webcam starting (30 fps)...
[SER] Connected to camera

To see a feed of the camera and live classification in your browser? Go to http://192.168.15.99:4913
On your browser access <IP>:4913.

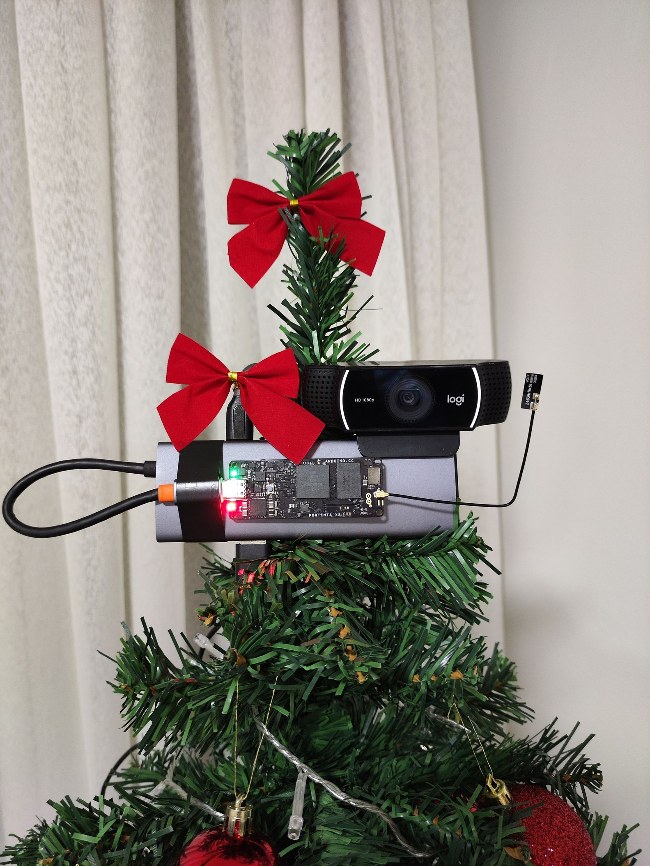
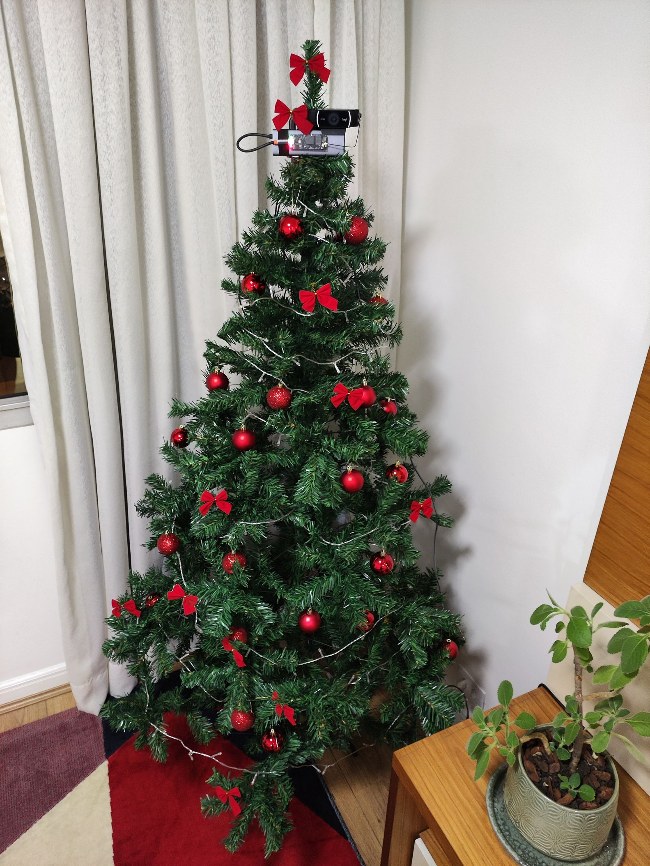
Positioning the Camera for Prime Image Detection
Use this live feed to help position your camera to where it can see people walking past the Christmas Tree. In my case, I positioned the camera on top of the Christmas Tree.
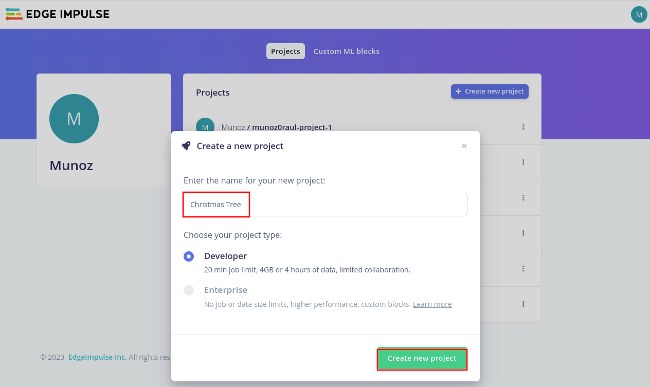
Create an Edge Impulse New Project
Head over to the Edge Impulse login page and log in. Create a new project, and name it something like Christmas Tree.
Collect New Image Data to Strengthen AI Detection
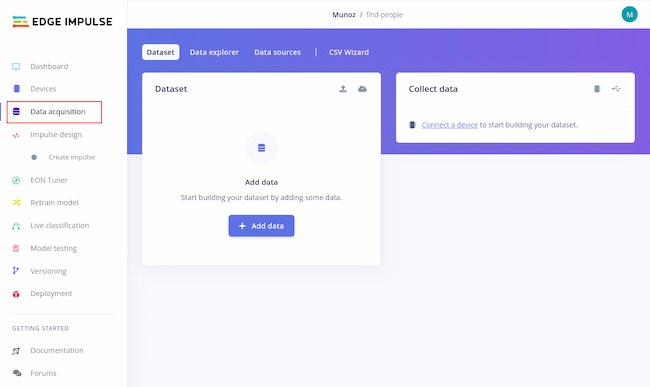
After you have made the new project, you should be sent to the Dashboard screen. Select Data Acquisition in the left menu:
Back on the device terminal, inside the same container we just tested the camera, run the command below to connect the device to the Edge Impulse platform:
device-docker:~$ edge-impulse-linux
You will be prompted for your:
- Edge Impulse email
- Edge Impulse password
- Select your project (Christmas Tree)
- Device Name (Embedded Linux)
Your terminal should look like this:
Edge Impulse Linux client v1.4.8
? What is your user name or e-mail address (edgeimpulse.com)? [email protected]
? What is your password? [hidden]

? To which project do you want to connect this device? Account / find-people
[GST] checking for /etc/os-release
[SER] Using microphone
[SER] Using camera C922 Pro Stream Webcam starting...
[SER] Connected to camera
[WS ] Connecting to wss://remote-mgmt.edgeimpulse.com
[WS ] Connected to wss://remote-mgmt.edgeimpulse.com
? What name do you want to give this device? Embedded Linux
[WS ] Device "Embedded Linux" is now connected to project "find-people". To connect to another project, run `edge-impulse-linux --clean`.
[WS ] Go to https://studio.edgeimpulse.com/studio/304032/acquisition/training to build your Machine Learning model!
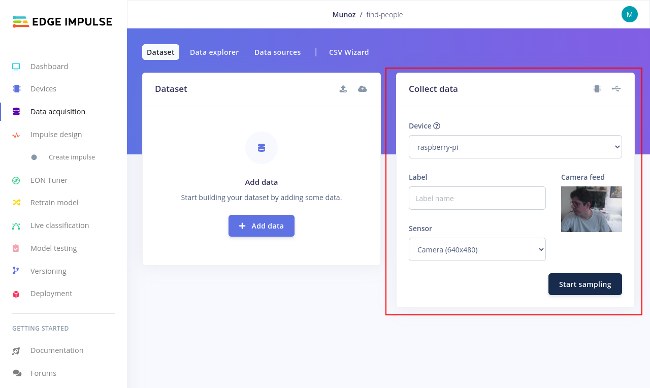
Once you have input all the necessary information, Edge Studio will automatically recognize your device as a camera. Back on the Edge Impulse project page, you should see a live preview of the camera:
Start Image Sampling in the Edge Studio Portal
It is time to start sampling!
On the Edge Studio portal, under the Label field, enter camera and select your embedded device from the Device dropdown. Take note of the live camera feed; this is a preview of the picture which will be taken for the dataset when you press the Sample button. To begin, press Start sampling:
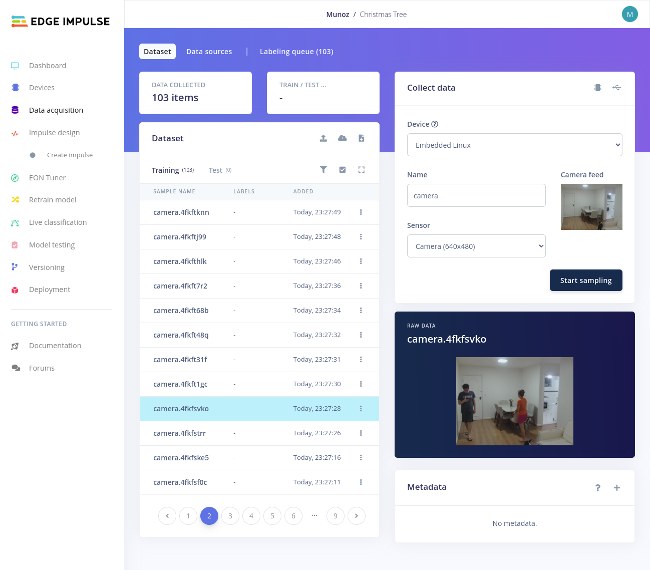
Just as we did when building our previous dataset, we need as robust and varied a picture set as possible. Try to capture different people walking past the camera, wearing different outfits, and play with the level of lighting. After taking 103 pictures from many different positions and different t-shirts, I felt comfortable to start labeling the pictures.
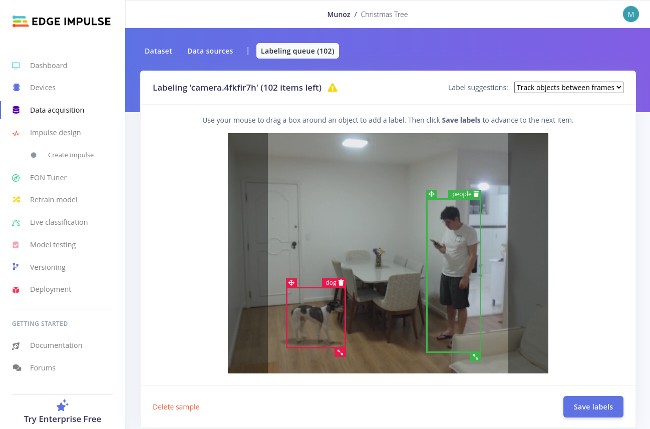
When you are happy with your dataset, click on the labeling queue tab on Edge Impulse Portal:
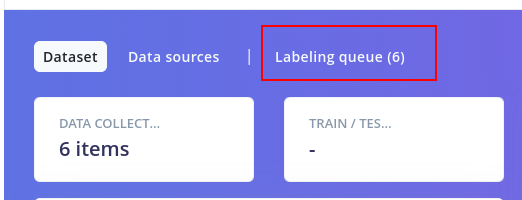
At this point, you will be shown every picture in the dataset and be tasked with drawing a box on the element we are trying to recognize. Draw a box around each person in the picture and assign them the label people. I also have dogs in many of the pictures, so I have drawn boxes on the dogs and given them the label dog.
After labeling all pictures in your dataset, it is time to train your model.
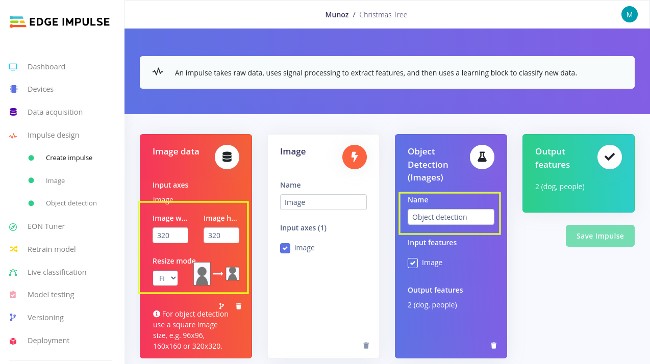
Create Impulse
In the left menu, click on Create Impulse and make sure you configure it just like the image below:
- Image data (320x320)
- Save Impulse
Setting Image Parameters
On the left menu, find Impulse Design → Image and just save the parameters:
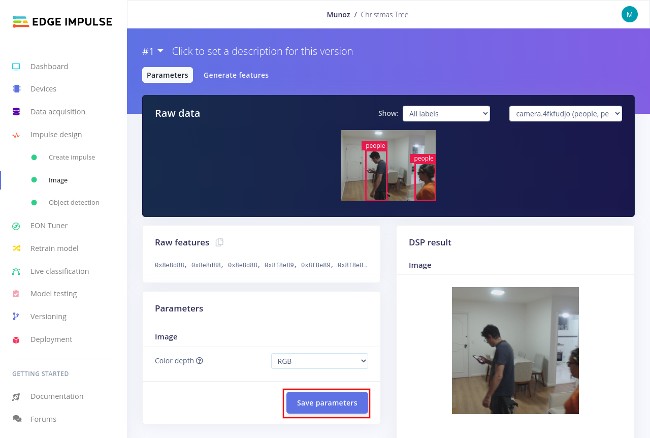
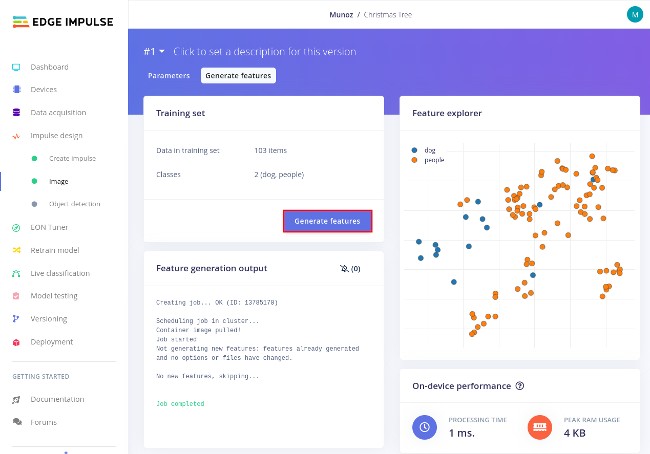
After saving, it should send you automatically to Generate Features. If that is not the case, click on the Generate Features tab, and then click the Generate Features button. Wait for the Feature generation output to complete:
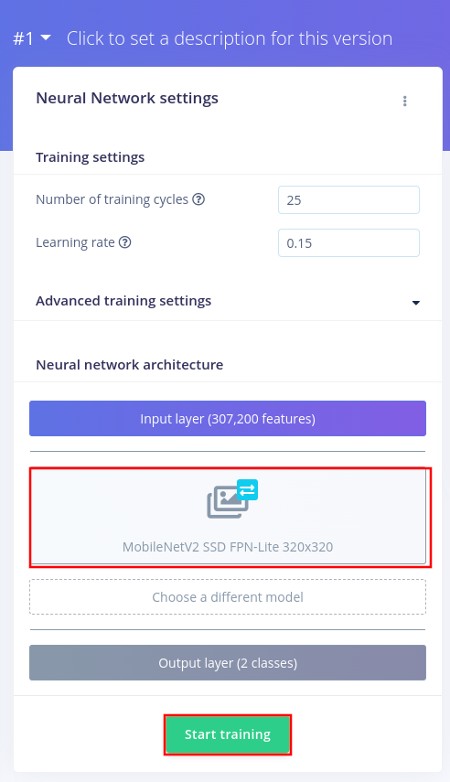
Object Detection
On the left menu, find Impulse Design → Object Detection.
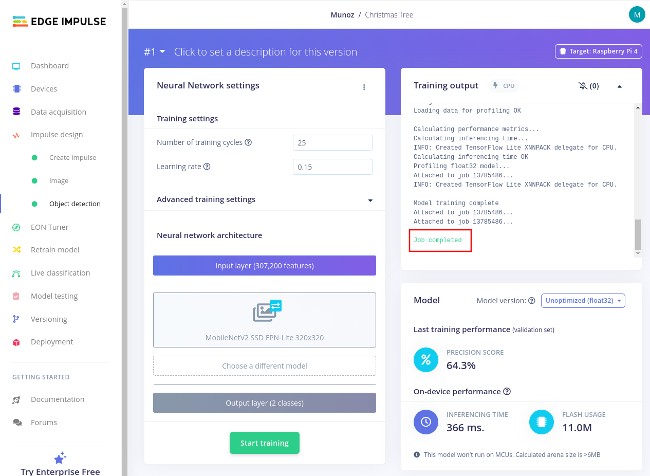
In the Neural Network settings, Find the Neural network architecture and change it to MobileNetV2 SSD FPN-Lite 320x320 like the picture below and start training:
This will take some time depending on how many pictures you have.
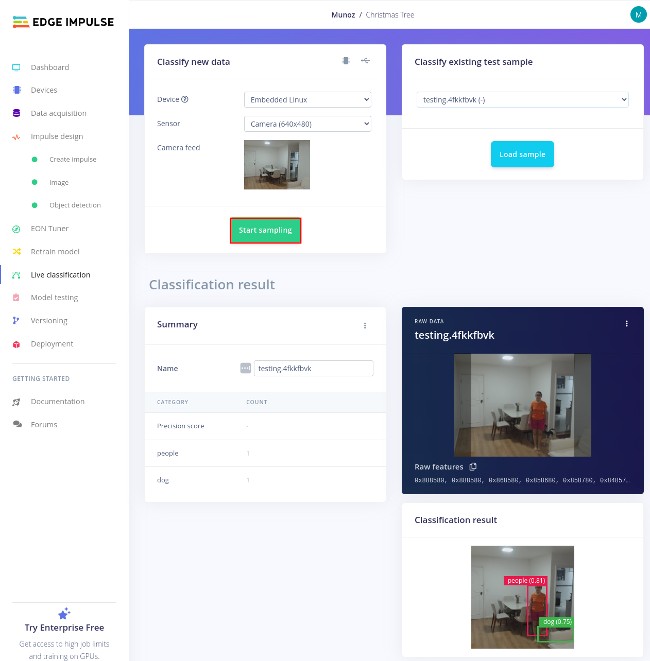
Live AI Image Classification
At this point, your model is complete! You can test from the Edge Impulse Portal. From the left menu, select Live Classification to see a live feed of your camera. Select Start sampling. If someone walks in front of the camera, it should now apply the people label to them, complete with their own box:
Running the Model on Your Embedded Device
It is also possible to live test the model directly on your embedded device, via the CLI tools.
If you are still running edge-impulse-camera-debug in the CLI container on your embedded device, stop it and run edge-impulse-linux-runner instead. This will download and compile the model and live-test it.
device-docker:~$ edge-impulse-linux-runner

[BLD] Building binary OK
[RUN] Downloading model OK
[RUN] Stored model version in /root/.ei-linux-runner/models/311695/v1/model.eim
[RUN] Starting the image classifier for Munoz / Christmas Tree (v1)
[RUN] Parameters image size 320x320 px (3 channels) classes [ 'dog', 'people' ]
[GST] checking for /etc/os-release
[RUN] Using camera C922 Pro Stream Webcam starting...
[RUN] Connected to camera
boundingBoxes 459ms. [{"height":25,"label":"people","value":0.805620551109314,"width":36,"x":121,"y":65}]
boundingBoxes 455ms. [{"height":26,"label":"people","value":0.870090901851654,"width":37,"x":121,"y":65}]
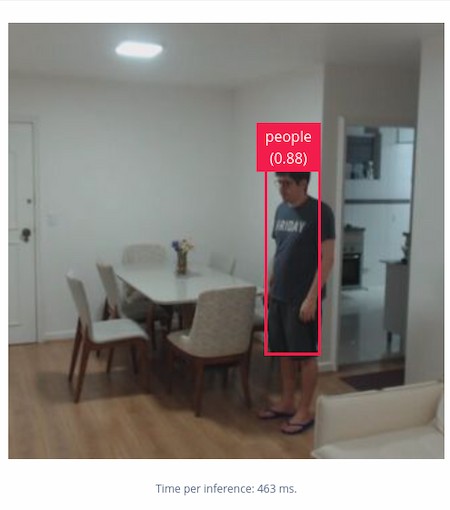
Now, when we step into the frame of the webcam, it will identify our face and show the people label in real-time!
You can also use the device IP port 4912 to see what the model is doing:
Recap and Conclusion
In this tutorial, we generated a new dataset enhanced our AI image detection capabilities with the camera positioned on the Christmas Tree. We trained our model with the new data and live tested: both via the Edge Impulse portal, and directly on the embedded device.
With a now more robust detection model, we can begin writing a Python script to manage our MQTT signals to turn the Christmas Tree on/off after detecting people entering or exiting the view of the Christmas Tree.
Continue Building Ai-Powered Christmas Tree
If you are interested in our entire 14-part series on how to build an AI powdered Christmas tree, browse through each section below. Each part brings you closer to mastering your build:
- Part 1: Your First FoundriesFactory AI-Powered Christmas Tree
- Part 2: Configure Network and Wi-Fi
- Part 3: A Yocto & Linux Tutorial for Building An AI-Powered Christmas Tree
- Part 4: Linux MicroPlatform (lmP) Config Tutorial for AI-Powered Christmas Tree
- Part 5: Modify & Extend Linux MicroPlatform for AI-Powered Christmas Tree
- Part 6: Using a MQTT Switch Module on Arduino Portenta X8
- Part 7: Creating a Shell Script Application and Adding to Linux microPlatform™ (MQTT)
- Part 8: Connecting the Web Camera Interface with Docker Container
- Part 9: Using Edge Impulse AI to Recognize Human Presence With Arduino Portenta X8
- Part 10: Enhancing the Image Detection Capabilities of our AI Powered Christmas Tree
- Part 11: Writing a Python App to Turn Our Christmas Tree On/Off Using AI
- Part 12: Creating a Docker Compose App to Automatically Power Your AI Christmas Tree On/Off
- Part 13: Running Docker Compose Application on a Raspberry Pi 4 to Power Our AI Christmas Tree
- Part 14: Managing Multiple SoM Platforms in the Same Factory