
Make sure your camera is mounted on /dev/video0 or replace the 0, according to your camera.
Welcome to part nine of our AI Powered Christmas Tree Series! The goal of this series is to serve as a guide for you to build your own AI powered Machine Learning Christmas Tree, thanks to the Arduino Portenta X8 SoM and Edge Impulse AI Platform.
In this tutorial, we will be introducing you to Edge Impulse tools, using them to create a ML algorithm. We will guide you through joining the platform, building your demo dataset, and testing.
Before jumping into this entry, be sure to check out the previous blog entries. You can find a summary of each tutorial and a sneak peek of what’s coming next on our project overview page.
Introduction to Edge Impulse
In this tutorial, you will configure the embedded Linux® device webcam to collect pictures and build a dataset to train a machine learning model, enabling it to recognize human presence! To do this we will be leveraging the power of Edge Impulse to train and deploy our ML model onto our embedded Linux device. Edge Impulse is a comprehensive platform that facilitates the development and deployment of machine learning models to edge devices.
With this platform, we can build your own dataset and train the model which will then run live on your embedded Linux device.
Prerequisites
This is part nine of our AI Powered Christmas Tree Series. Please ensure you’ve completed the earlier parts before continuing.
You will also need:
Edge Impulse CLI Container
Edge Impulse provides a CLI (Command Line Interface) which we can use to connect to our device and collect the data to train the model.
For this, we are going to create a container with all the requisite packages for the Edge Impulse CLI, and with access to the connected webcam. We will do this directly on the embedded Linux device.
On your device, create the Dockerfile:
device:~$ vim Dockerfile
FROM debian:bullseye-slim
ENV DEBIAN_FRONTEND=noninteractive

RUN apt-get update -y && \
    apt-get install -y --no-install-recommends \
    fswebcam \
    v4l-utils \
    wget \
    ca-certificates

RUN wget https://deb.nodesource.com/setup_12.x
RUN bash setup_12.x

RUN apt-get update -y && \
    apt-get install -y --no-install-recommends \
    gcc \
    g++ \
    make \
    build-essential \
    nodejs \
    sox \
    gstreamer1.0-tools \
    gstreamer1.0-plugins-good \
    gstreamer1.0-plugins-base \
    gstreamer1.0-plugins-base-apps \
    vim \
    v4l-utils \
    usbutils \
    udev \
    git \
    libatlas-base-dev \
    libportaudio2 \
    libportaudiocpp0 \
    portaudio19-dev \
    ffmpeg \
    libsm6 \
    libxext6 \
    python3-pip \
    python3-dev \
    python3-pyaudio

RUN pip3 install edge_impulse_linux -i https://pypi.python.org/simple
RUN pip3 install opencv-python six

RUN git clone https://github.com/edgeimpulse/linux-sdk-python

RUN npm config set user root
RUN npm install edge-impulse-linux -g --unsafe-perm
Now build the Dockerfile:
device:~$ docker build -t edge-impulse .
Make sure you have the camera connected to your embedded Linux device and run the Docker container image with the command below:
device:~$ docker run -it \
           --network=host \
           --device-cgroup-rule='c 81:* rmw' \
           -v /dev/video0:/dev/video0 \
           -v /run/udev/:/run/udev/ \
           -v /var/rootdirs/home/fio/image/:/image/ \
           edge-impulse
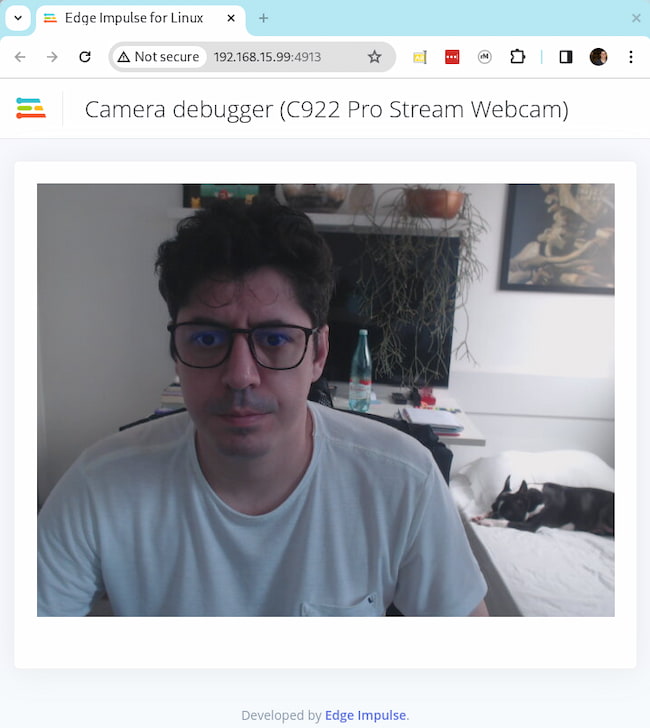
Now inside the container, run the camera test and use the provided URL to test your camera:
device-docker:~$ edge-impulse-camera-debug


[GST] checking for /etc/os-release
[SER] Using camera C922 Pro Stream Webcam starting (30 fps)...
[SER] Connected to camera

To see a feed of the camera and live classification in your browser? Go to http://192.168.15.99:4913.
On your computer, access <IP>:4913.
Edge Impulse Account
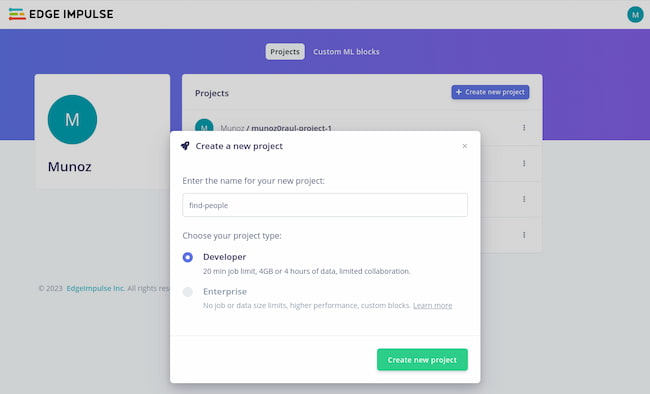
If you haven’t already done so, head over to Edge Impulse signup page and create an account. Once you are logged in, create a new project and name it something appropriate like find-people:
Collect new Data for AI Learning
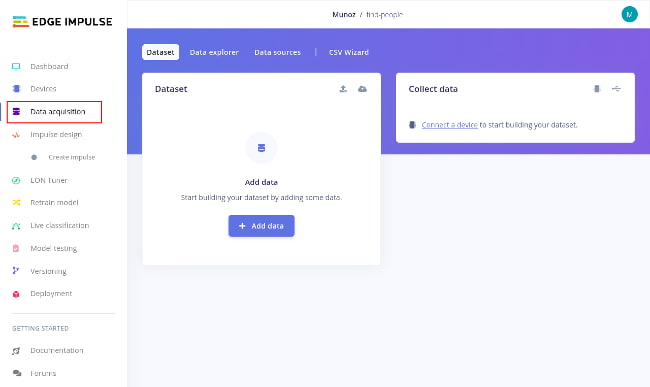
Select Data acquisition in the left menu:
Back on the device terminal, inside the same container we just tested the camera, run the command below to connect the device to the Edge Impulse platform:
device-docker:~$ edge-impulse-linux
You will be prompted for your:
- Edge Impulse email
- Edge Impulse password
- Select your project (find-people)
- Device Name (Embedded Linux)
Your terminal should look like this:
Edge Impulse Linux client v1.4.8
? What is your user name or e-mail address (edgeimpulse.com)? [email protected]
? What is your password? [hidden]

? To which project do you want to connect this device? Account / find-people
[GST] checking for /etc/os-release
[SER] Using microphone
[SER] Using camera C922 Pro Stream Webcam starting...
[SER] Connected to camera
[WS ] Connecting to wss://remote-mgmt.edgeimpulse.com
[WS ] Connected to wss://remote-mgmt.edgeimpulse.com
? What name do you want to give this device? Embedded Linux
[WS ] Device "Embedded Linux" is now connected to project "find-people". To connect to another project, run `edge-impulse-linux --clean`.
[WS ] Go to https://studio.edgeimpulse.com/studio/304032/acquisition/training to build your machine learning model!
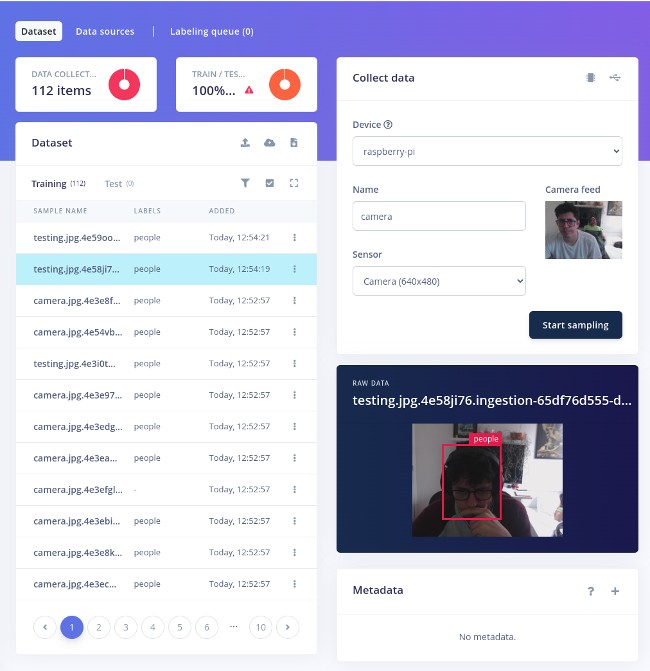
Once you have input all the necessary information, Edge Studio will automatically recognize your device as a camera. You can see you can view this back at your project page with Edge Impulse:
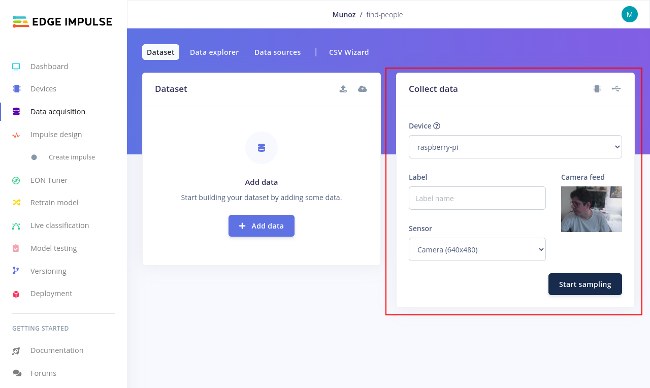
Start Sampling Data
It is time to start sampling! Our goal is to train a model which allows the Embedded Device to recognize when a person has entered the field of view for the webcam. To do this, we are going to need as many pictures of a person (you) as possible, taken directly with the webcam, in as varied conditions as possible — wearing different outfits, with the lights on and off etc. The greater the variety and sample size of the pictures, the stronger the overall dataset will be — which will make it more effective in training the model.
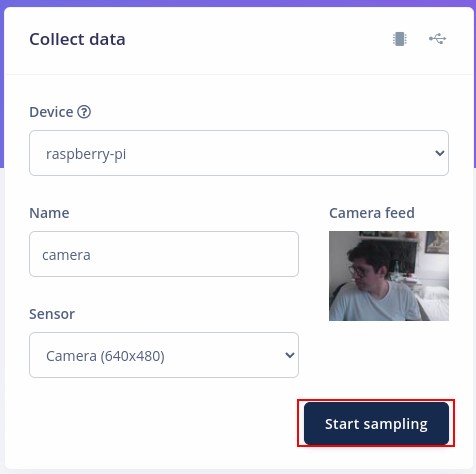
On the Edge Studio portal, add the Label camera to your device and note the live camera feed. This is a preview of the picture which will be taken for the dataset. Press the Start sampling button:
A pop-up will ask “Are you building an object detection project?”, select Yes.
Now every time you click on Start Sampling button, a new picture will be stored in the Dataset list:
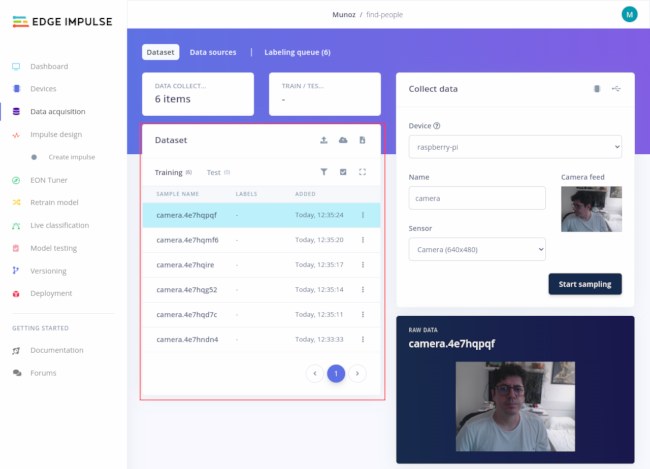
Build as comprehensive a dataset as you are able. For reference, I took about 100 pictures, using different t-shirts, and changing the light level and face position.
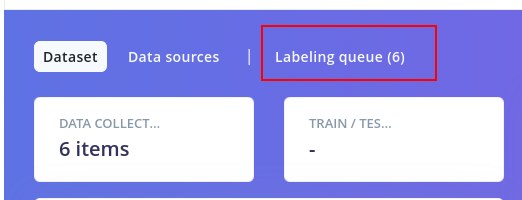
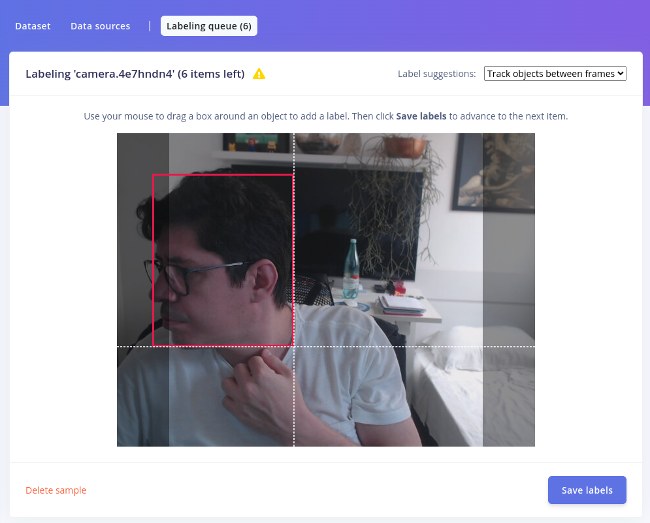
When you are comfortable with your dataset, click on the labeling queue.
At this point, you will be shown every picture in the dataset and be tasked with drawing a square on the element we are trying to recognize. In our case, it is of course a face, so drag a square into your face:
Next, create a label called people:
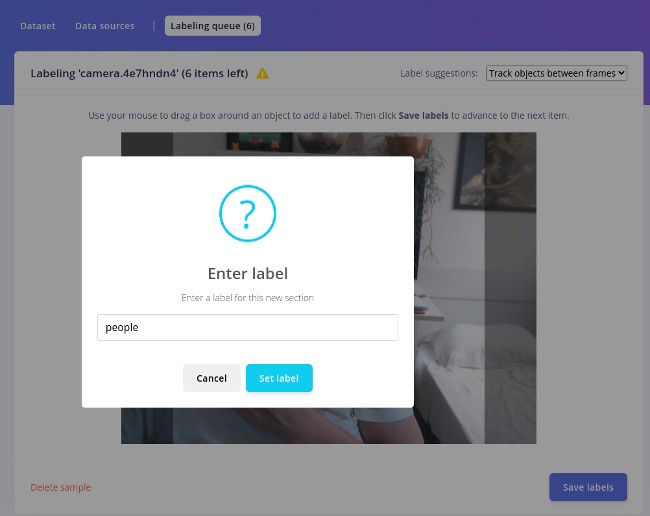
Save the label and adjust the square to label your face for all other pictures.
Now that you have all the pictures labeled and a good amount of pictures in your dataset, it is time to train your model.
Remember, the stronger the dataset you build, the more effective the model will be. You can always go back, add more pictures, labels, and retrain the model if you feel it is not performing as well as you would like.
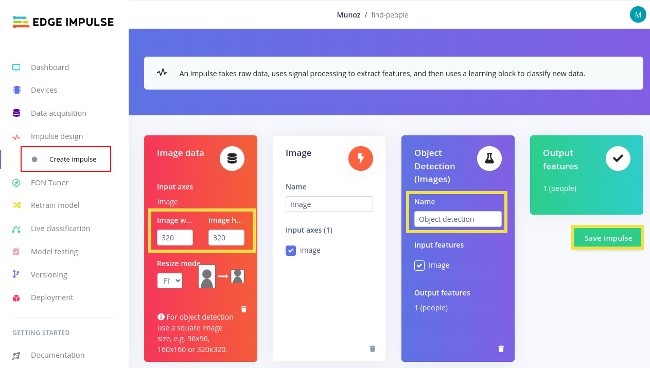
Creating an Impulse
In the left menu, click on Create impulse and make sure you configure it just like the image below.:
- Image data (320x320)
- Save Impulse
Image
On the left menu, find Impulse Design → Image and just save the parameters:
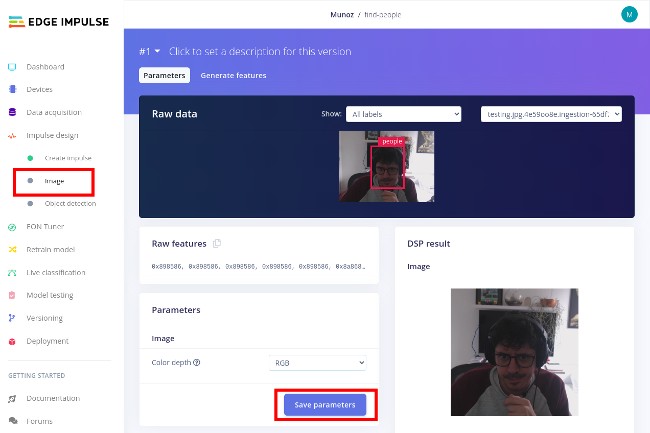
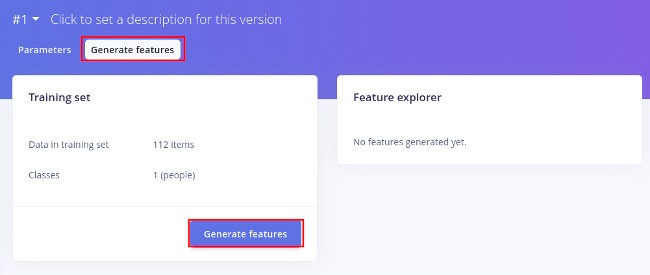
After saving, it should send you automatically to Generate Features. In case it not, click on Generate Feature and then Generate Features:
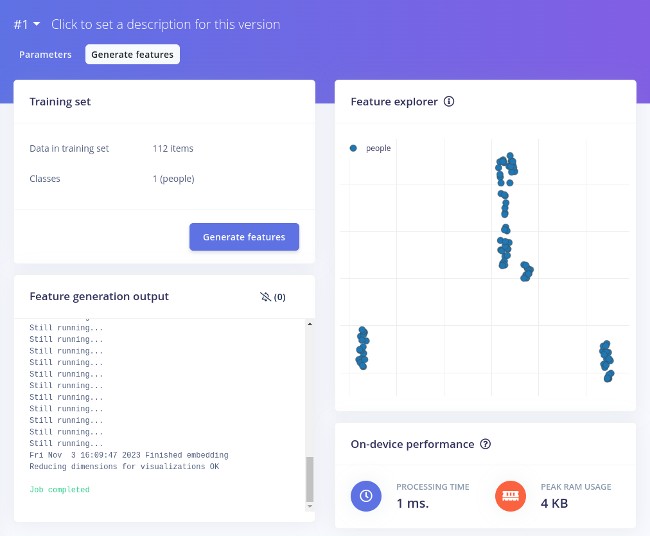
Wait for the Feature generation output to complete:
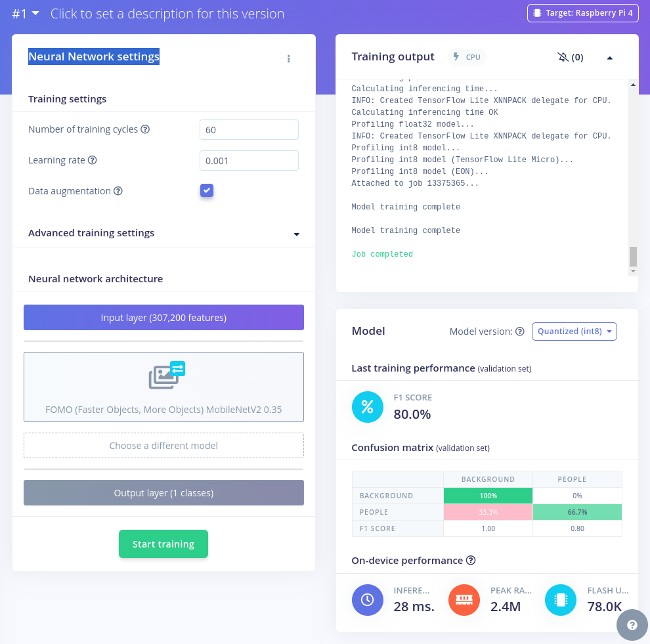
Object Detection Parameters
On the left menu, find Impulse Design → Object Detection.
In the Neural Network settings, click on Start training:
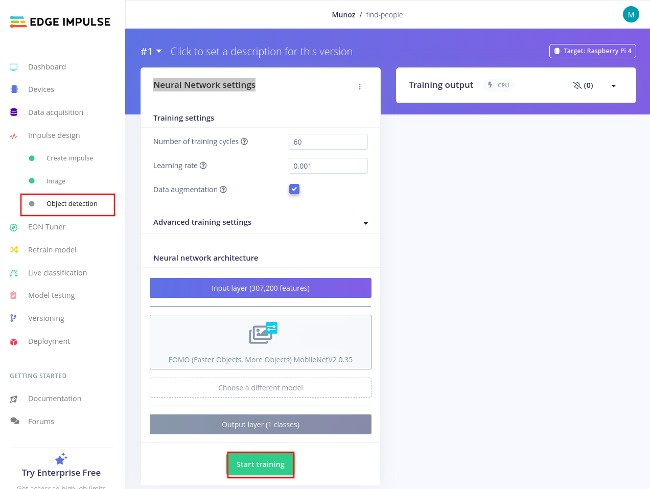
That can take some time, depending on how many pictures you have.
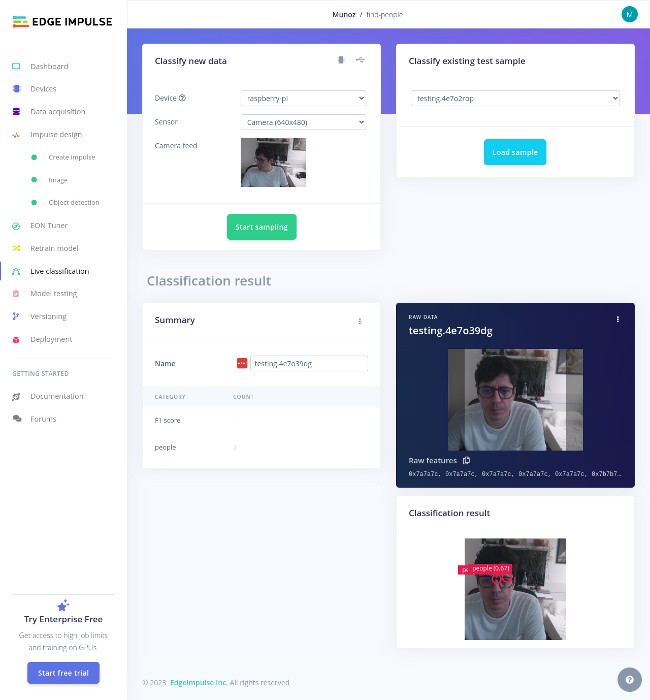
Live Classification Parameters
In the left menu, on the Live Classification, you can live-test your model. Click on Live Classification and Start Sampling:
Running the Model on the Embedded Linux Device
On your device, we can also use the CLI to live-test your model.
Stop the CLI and run the edge-impulse-linux-runner. This will download and compile the model and live-test it.
device-docker:~$ edge-impulse-linux-runner

Edge Impulse Linux runner v1.4.8

[RUN] Downloading model...
[BLD] Created build job with ID 13376809
[BLD] Connected to job
[BLD] Scheduling job in cluster...
[BLD] Container image pulled!
[BLD] Job started
[BLD] Scheduling job in cluster...
[BLD] Job started
[BLD] Exporting TensorFlow Lite model...
[BLD] Exporting TensorFlow Lite model OK

Removing clutter...
[BLD] Removing clutter OK

Copying output...
Copying output OK
[BLD] Scheduling job in cluster...
[BLD] Container image pulled!
[BLD] Job started
[BLD] Building binary...
[BLD] aarch64-linux-gnu-g++ ...
At global scope:
cc1plus: warning: unrecognized command line option '-Wno-asm-operand-widths'
mkdir -p build
[BLD] aarch64-linux-gnu-g++ edge-impulse-sdk...
[BLD] dk/CMSIS/DSP/Source/TransformFunctions/arm_cfft_radix2_init_f16.o ...
[BLD] S/DSP/Source/MatrixFunctions/arm_mat_scale_q15.o ...
[BLD] _mult_f32.o ...
2023-11-03T17:28:30.538900640Z Building binary OK
[BLD] Building binary OK
[RUN] Downloading model OK
[RUN] Stored model version in /root/.ei-linux-runner/models/304032/v1/model.eim
[RUN] Starting the image classifier for Munoz / find-people (v1)
[RUN] Parameters image size 320x320 px (3 channels) classes [ 'people' ]
[GST] checking for /etc/os-release
[RUN] Using camera C922 Pro Stream Webcam starting...
[RUN] Connected to camera

Want to see a feed of the camera and live classification in your browser? Go to http://192.168.15.99:4912

boundingBoxes 45ms. []
boundingBoxes 31ms. [{"height":8,"label":"people","value":0.7227305769920349,"width":8,"x":128,"y":152}]
boundingBoxes 29ms. []
boundingBoxes 29ms. [{"height":16,"label":"people","value":0.5437541007995605,"width":8,"x":128,"y":152}]
boundingBoxes 30ms. [{"height":8,"label":"people","value":0.5846187472343445,"width":8,"x":128,"y":160}]
boundingBoxes 62ms. [{"height":8,"label":"people","value":0.688189685344696,"width":8,"x":128,"y":152}]
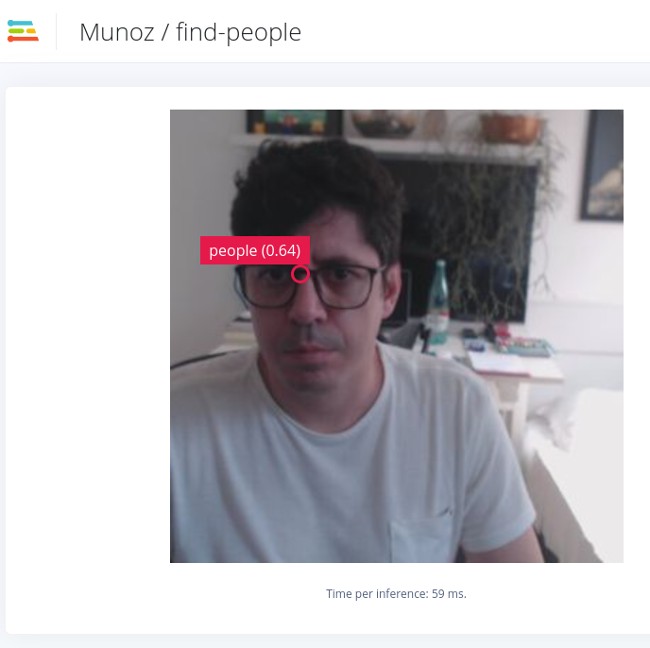
Now, when we step into the frame of the webcam, it will identify our face and show the people label in real-time!
You can also use the device IP port 4912 to see what the model is doing:
Testing the Python SDK
Until now, we've employed the Edge Impulse Command Line Interface (CLI) for training the module and conducting tests. However, the next step involves utilizing a Python example provided by Edge Impulse to assess our model.
This shift is motivated by the need for your final application to be programmable, enabling it to take actions based on the results derived from the processed image. The Dockerfile we downloaded also included the linux-sdk-python. This is the relevant line from the Dockerfile:
RUN git clone https://github.com/edgeimpulse/linux-sdk-python
If you copied the example Dockerfile earlier, everything you need is already inside the container.
Navigate to the examples directory:
device-docker:~$ cd /linux-sdk-python/examples/image
To test the Python SDK, we need to first download our model using the Edge Impulse CLI:
device-docker:~$ edge-impulse-linux-runner --download modelfile.eim
Now, run classify.py, pointing to the model we just downloaded:
device-docker:~$ python3 classify.py modelfile.eim

Found 1 bounding boxes (29 ms.)
	people (0.77): x=48 y=144 w=8 h=24
Found 1 bounding boxes (28 ms.)
	people (0.83): x=88 y=160 w=8 h=16
Found 3 bounding boxes (28 ms.)
	people (0.93): x=56 y=144 w=8 h=8
	people (0.93): x=88 y=160 w=8 h=16
Note that every time the Python code finds people, it prints people, the percentage of trust, and their position.
If your output is similar to the above, congratulations, that confirms that the Python version of our model is working!
Recap and Conclusion
In this tutorial, we introduced you to Edge Impulse and with their Edge AI Platform tools and you created your first model capable of detecting human presence. In the next tutorial, we will be expanding on this model and further training it to be better at detection.
We also tested the sample Python implementation of our model, a valuable prototype of the full version which will be capable of signaling our switch to control your Christmas Tree’s lights.
Continue Building Ai-Powered Christmas Tree
If you are interested in our entire 14-part series on how to build an AI powdered Christmas tree, browse through each section below. Each part brings you closer to mastering your build:
- Part 1: Your First FoundriesFactory AI-Powered Christmas Tree
- Part 2: Configure Network and Wi-Fi
- Part 3: A Yocto & Linux Tutorial for Building An AI-Powered Christmas Tree
- Part 4: Linux MicroPlatform (lmP) Config Tutorial for AI-Powered Christmas Tree
- Part 5: Modify & Extend Linux MicroPlatform for AI-Powered Christmas Tree
- Part 6: Using a MQTT Switch Module on Arduino Portenta X8
- Part 7: Creating a Shell Script Application and Adding to Linux microPlatform™ (MQTT)
- Part 8: Connecting the Web Camera Interface with Docker Container
- Part 9: Using Edge Impulse AI to Recognize Human Presence With Arduino Portenta X8
- Part 10: Enhancing the Image Detection Capabilities of our AI Powered Christmas Tree
- Part 11: Writing a Python App to Turn Our Christmas Tree On/Off Using AI
- Part 12: Creating a Docker Compose App to Automatically Power Your AI Christmas Tree On/Off
- Part 13: Running Docker Compose Application on a Raspberry Pi 4 to Power Our AI Christmas Tree
- Part 14: Managing Multiple SoM Platforms in the Same Factory