

In Part 1 of this Arduino UNO Q Elf Detector Series, we mastered the simple dual-core architecture by blinking a single LED. But let’s be honest: a single blinking light isn't going to scare off a determined elf. They make toys; they know how LEDs work. To truly secure the workshop, we need "shock and awe."
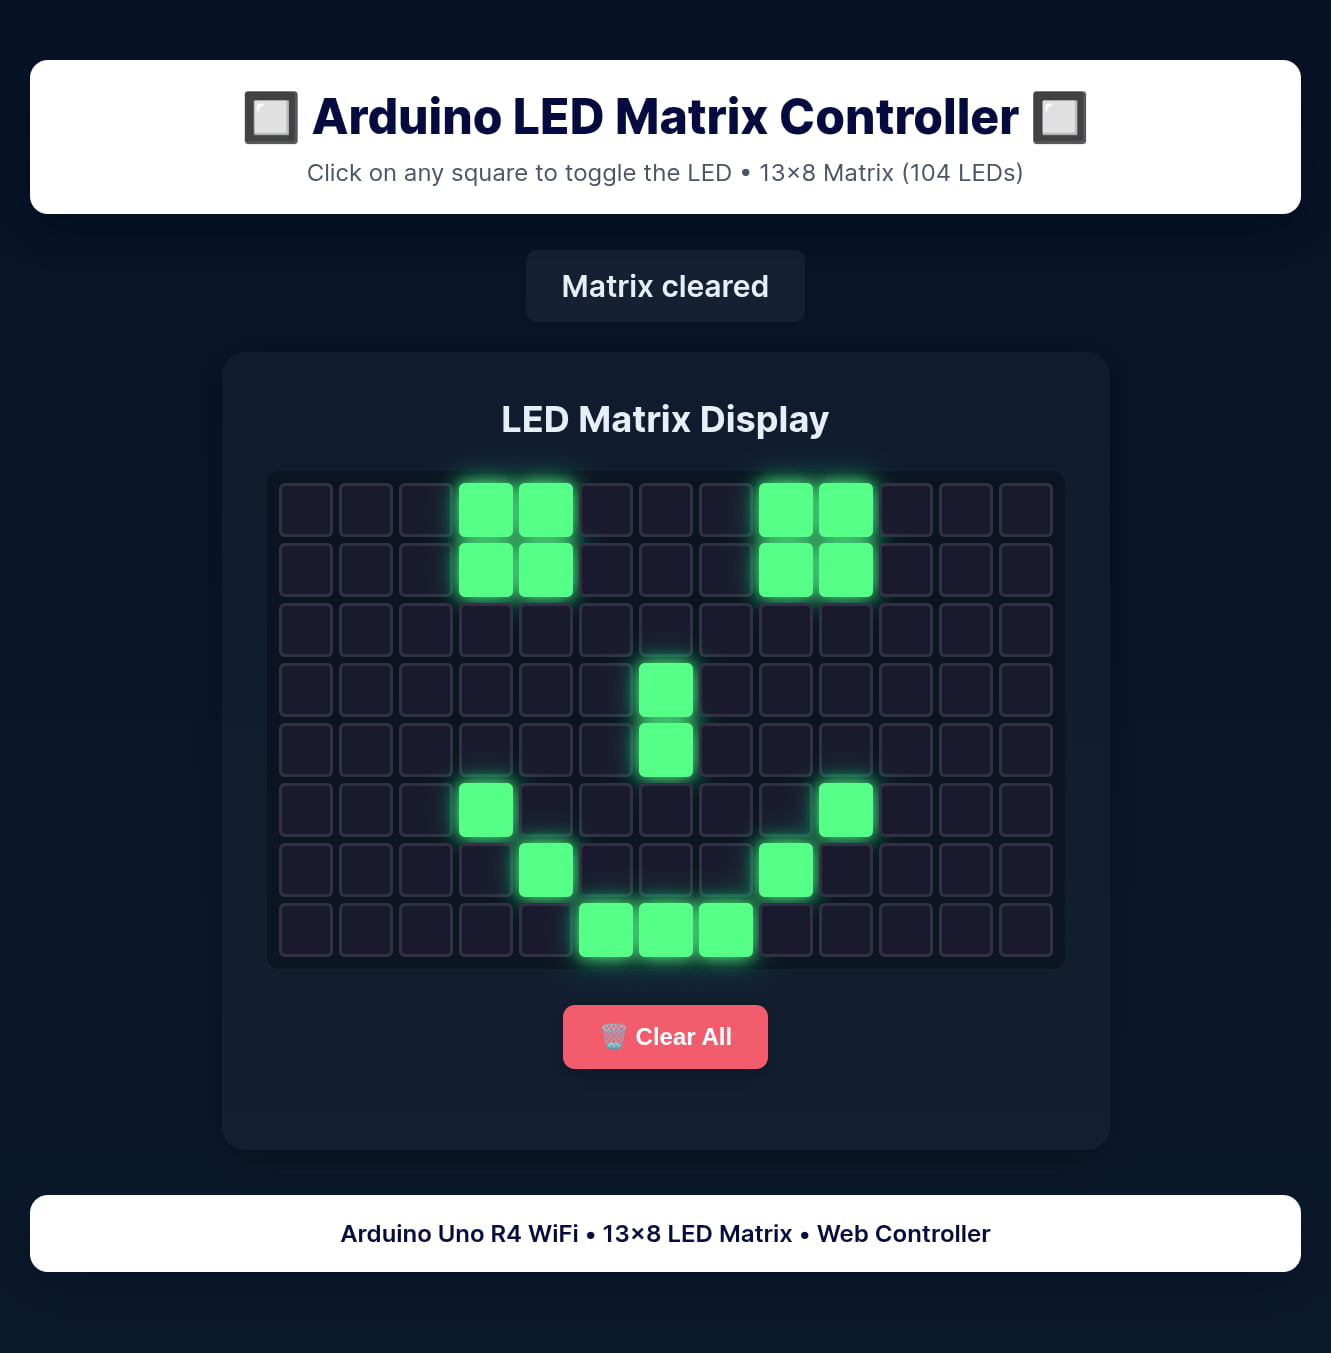
We are moving to a more sophisticated use case: controlling the Arduino UNO Q’s built-in 13x8 LED matrix display. That is 104 individually controllable LEDs; enough to turn my workbench into a blinding disco of deterrence.
Prerequisites
Before proceeding, you must have completed Part 1: Blinking an LED.
- An Arduino UNO Q powered and connected to the internet.
- A FoundriesFactory™ platform account with a created Factory.
- The
fioupdaemon running and managing updates automatically. - Git configured with your Factory repository cloned.
- The
arduino-led-webuiapplication successfully removed from your device.
The Application Architecture
This project takes the dual-core communication pattern we learned in Part 1 and applies it to a more complex display system.
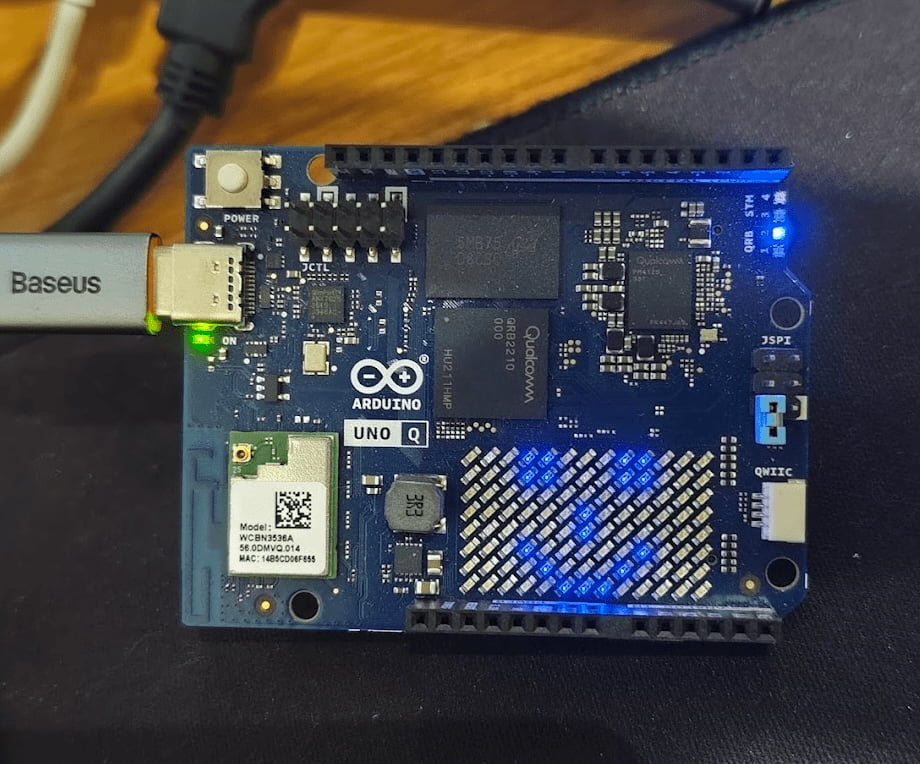
The Arduino UNO Q features a 13×8 red LED matrix (104 individually controllable LEDs) built into the board. This matrix is controlled through dedicated hardware on the STM32U5 MCU.
The Challenge: Unlike simple GPIO LEDs, the matrix uses a packed binary format where all 104 LED states are stored in just 128 bits (4 × 32-bit integers)
The Solution:
- Qualcomm DragonwingTM (MPU): Runs a Flask web server serving an interactive 13x8 grid interface.
- The Bridge: Transmits coordinate data (x, y) from the web app to the MCU in real-time.
- STM32U5 (MCU): Receives the coordinates, converts them to the packed binary format, and updates the hardware with precise timing.
This entire "Browser → Cloud → Linux → Bridge → MCU → Hardware" round trip happens in less than 30ms.
Step 1: Understanding the Application
Before we deploy, let's look at what we are building
The LED Matrix Interface
While our previous app toggled individual LEDs, this project controls a complete display. The web interface presents a 13×8 clickable grid that mirrors the physical matrix:
13 columns × 8 rows = 104 LEDs
- Click a square: The corresponding LED lights up on the board.
- Click again: The LED turns off.
- Clear All: Resets the entire display.
Inside the arduino-matrix-webui directory, we have:
index.html: The interactive grid UImain.py: The Flask server managing state and Bridge communication.sketch.ino: The MCU firmware that handles the binary frame buffer.Dockerfile: The container build definition includingarduino-cliandOpenOCD
Step 2:Deploying the Matrix Application
Since we already set up the repository in Part 1, deployment is straightforward. We will fetch the new code from our demo remote and push it to your Factory.
Navigate to your containers.git folder on your host machine and run:
- Add the demo remote (if you removed it in Part 1):
host:~$ git remote add arduino-demo https://github.com/foundriesio/containers.git
host:~$ git fetch arduino-demo arduino-demo-25Q4
- Checkout the application folder:
host:~$ git checkout arduino-demo/arduino-demo-25Q4 -- arduino-matrix-webui
- Commit and Push to your Factory:
host:~$ git add arduino-matrix-webui
host:~$ git commit -m "Adding Arduino LED Matrix WebUI demo"
host:~$ git push
What Just Happened?
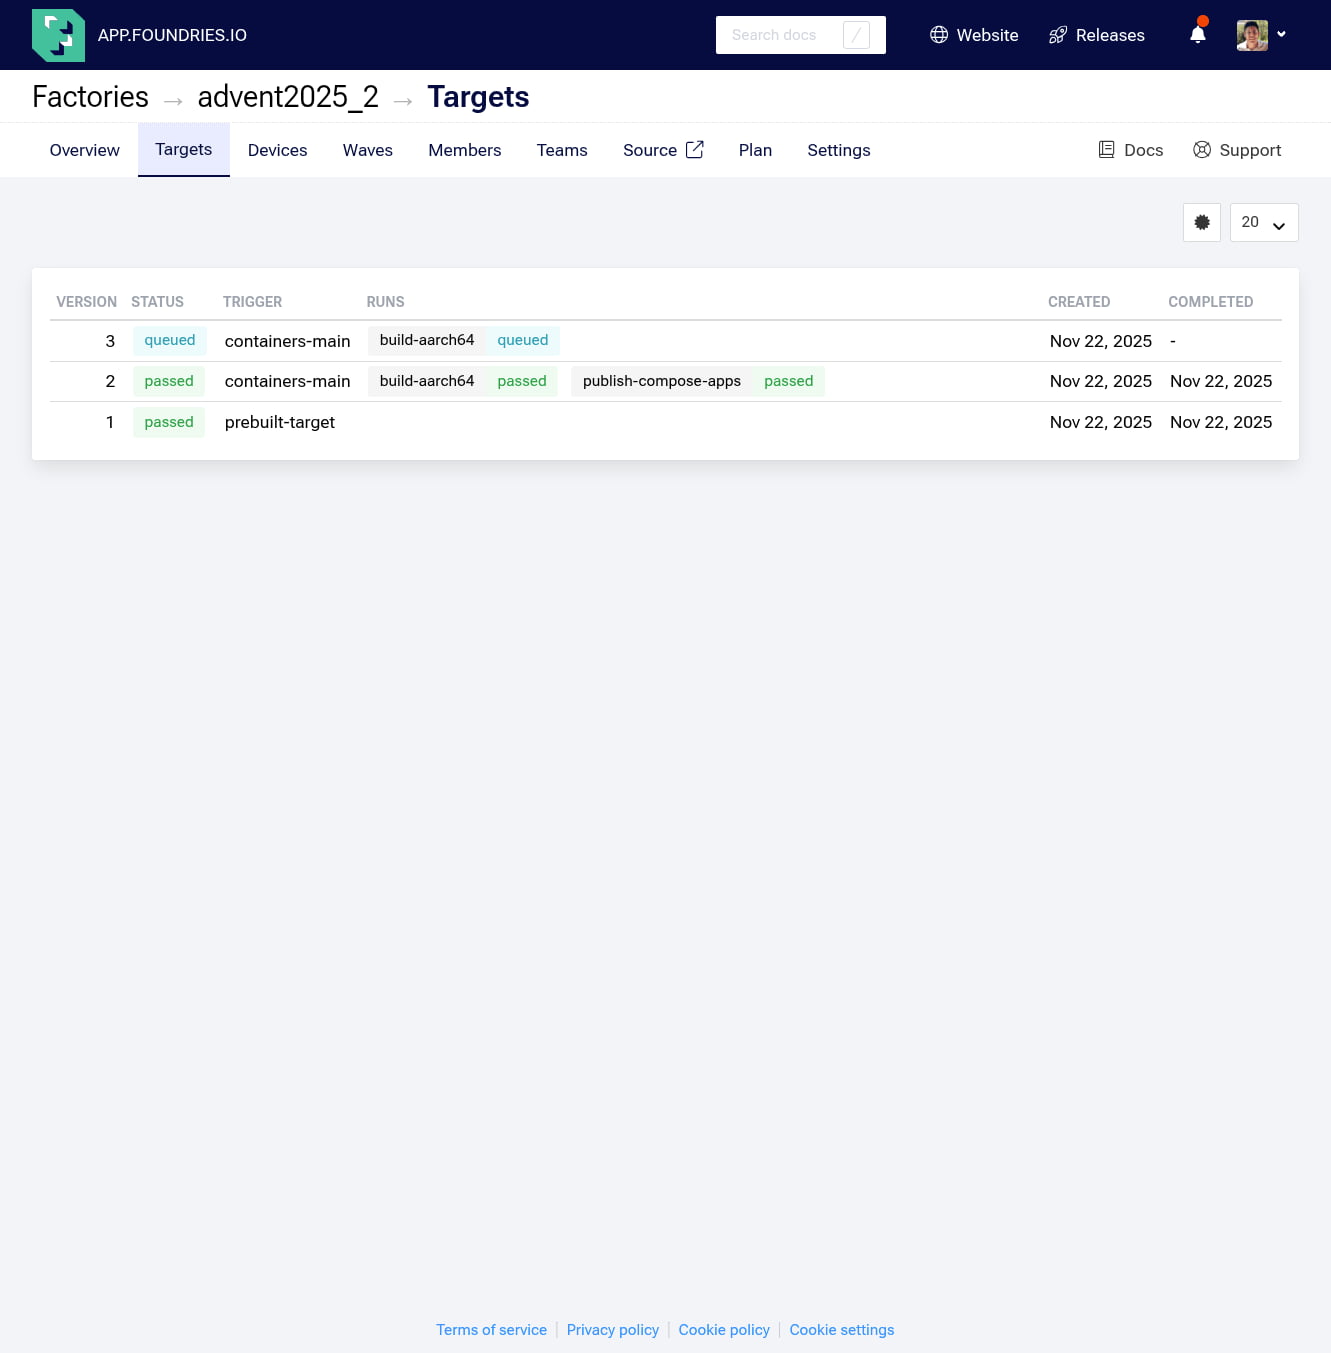
FoundriesFactory detected the push, triggered a CI/CD build job, compiled the container, and published it to your private registry. You can monitor the build progress in your Targets dashboard at:
Step 3: Enabling the Application
In Part 1, we manually updated the device using the CLI. This time, we will use the FoundriesFactory Web UI to manage our fleet. This demonstrates how you can remotely configure which applications run on your devices without touching the device terminal.
- Navigate to your Devices page:
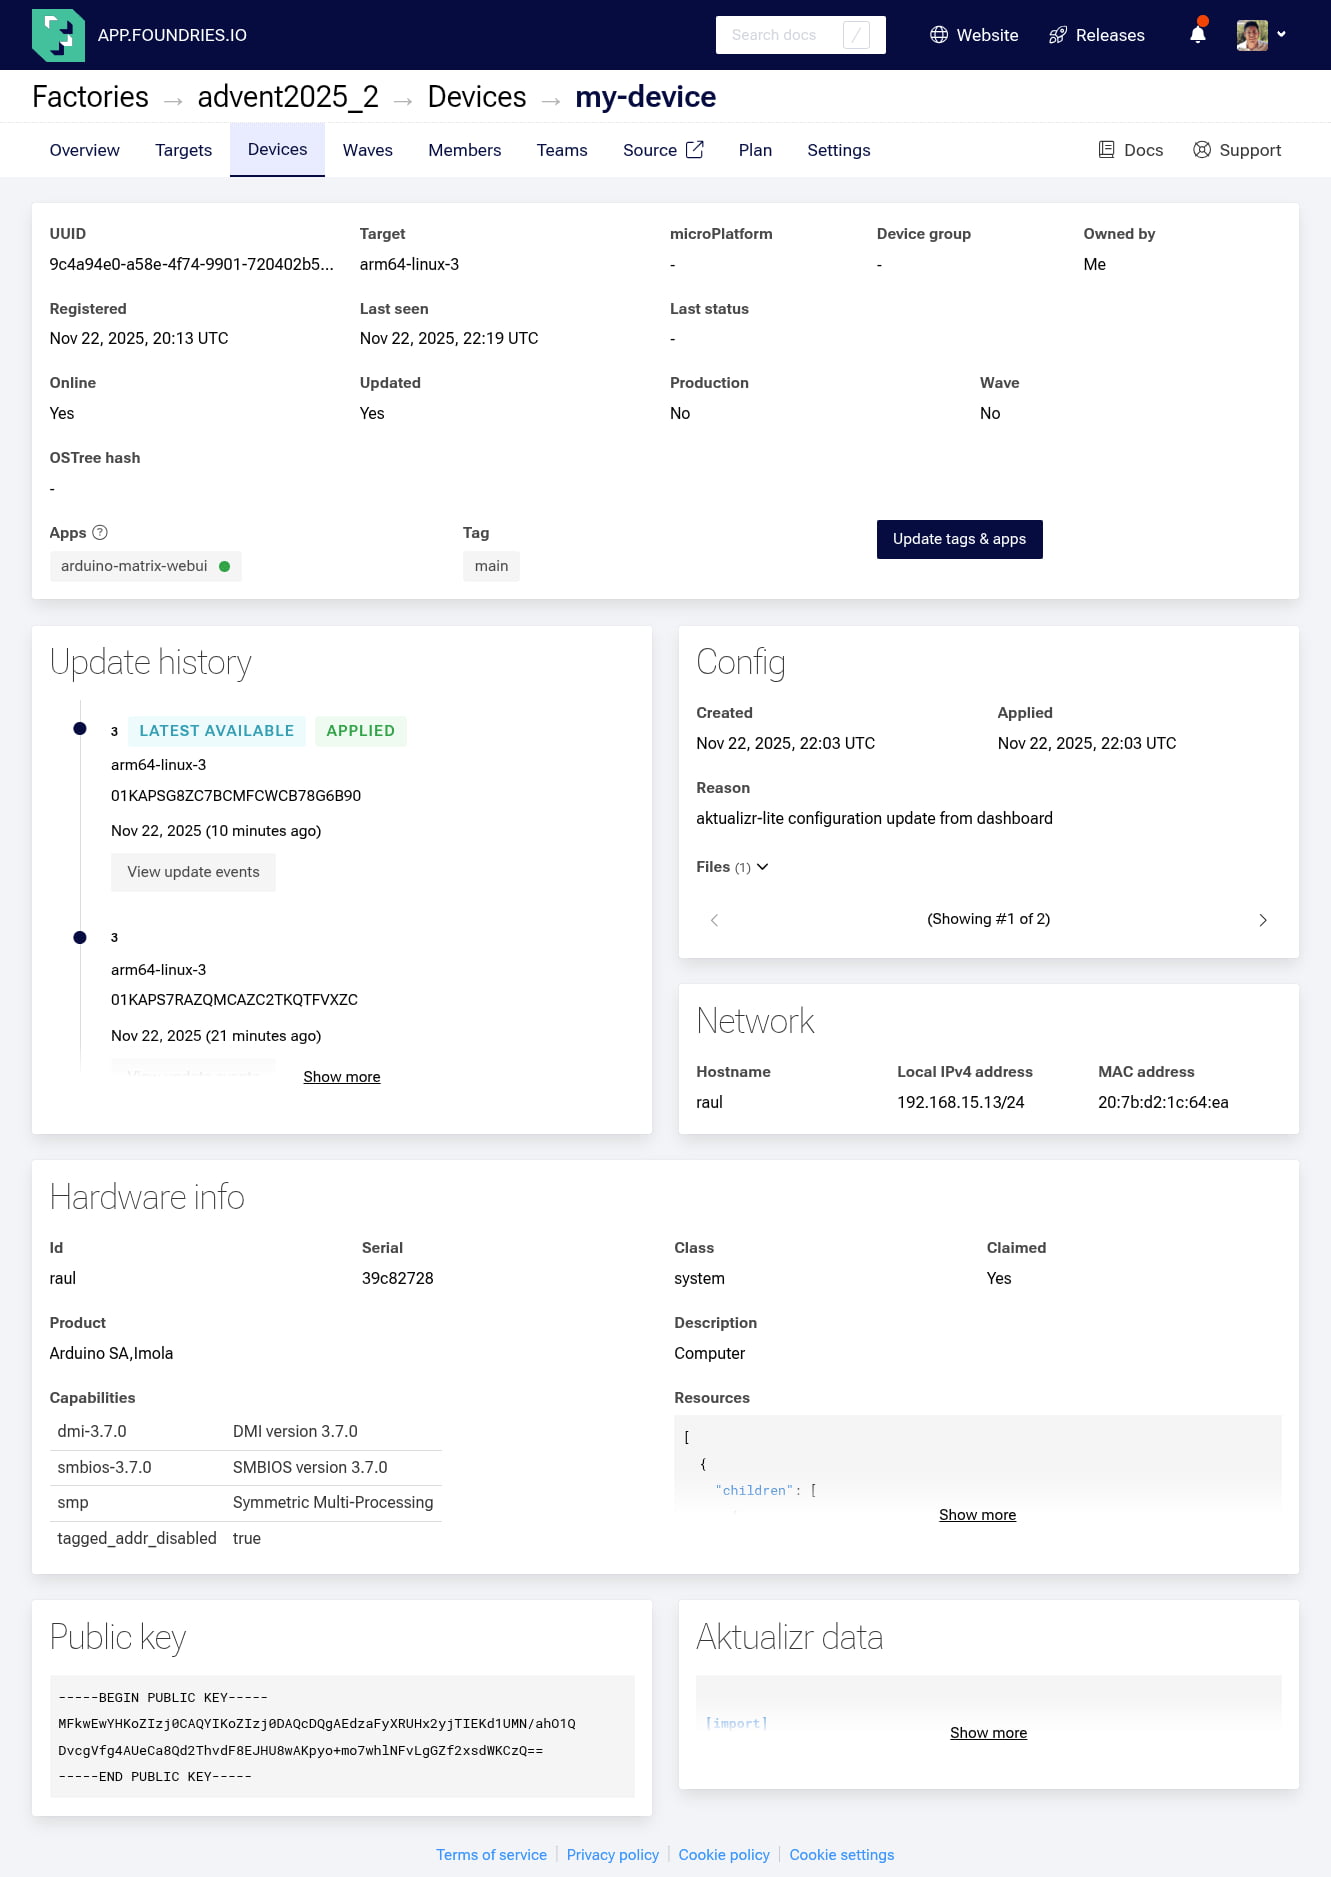
https://app.foundries.io/factories/<FACTORY-NAME>/devices/ - Select your Arduino UNO Q device from the list
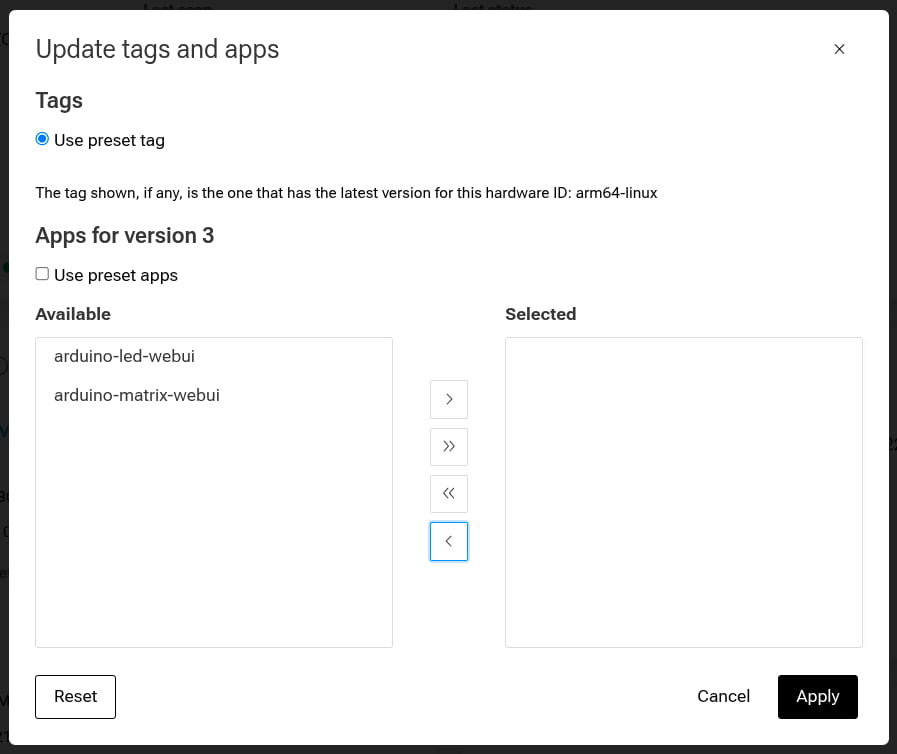
- Click on Update tags & apps
- Drag and Drop: Move
arduino-matrix-webuifrom the left (Available) to the right (Selected).

5. Click "Apply"
The Update Process: Your device's fioup daemon (which polls for updates automatically) will detect this configuration change, download the new container, stop any old apps, and start the new Matrix Controller.
You can verify this is happening by checking the logs on your device:
device:~$ journalctl -f -u fioup
Expected output:
Nov 22 20:30:15 raul fioup[5003]: [1/6] Checking ... new update from 2 [] to 3 [arduino-matrix-webui]
Nov 22 20:30:15 raul fioup[5003]: [2/6] Initializing ... fetch size: 652.3 MiB, 24 blobs; add: [arduino-matrix-webui]
Nov 22 20:30:15 raul fioup[5003]: [3/6] Fetching ...
Nov 22 20:30:45 raul fioup[5003]:          100%  [=========================]  652.3 MiB / 652.3 MiB | 24/24 blobs
Nov 22 20:30:45 raul fioup[5003]: [4/6] Stopping ... done
Nov 22 20:30:45 raul fioup[5003]: [5/6] Installing ...
Nov 22 20:30:45 raul fioup[5003]:         Installing app hub.foundries.io/<FACTORY>/arduino-matrix-webui@sha256:...
Nov 22 20:30:52 raul fioup[5003]:         Image loaded: hub.foundries.io/<FACTORY>/arduino-matrix-webui@sha256:...
Nov 22 20:30:52 raul fioup[5003]:       Done
Nov 22 20:30:52 raul fioup[5003]: [6/6] Starting ...
Nov 22 20:30:53 raul fioup[5003]:         starting arduino-matrix-webui --> hub.foundries.io/<FACTORY>/arduino-matrix-webui@sha256:... done
Nov 22 20:30:53 raul fioup[5003]:       Done
Step 4: Testing the Matrix Drawing Interface
Once the logs show "Done" and "Starting...", your application is live!
1. Verify the Container:
Check the device logs to ensure the container started successfully:
device:~$ docker ps -a
You should see arduino-led-webui with the status Up.
- - - - Output Example - - -
CONTAINER ID   IMAGE                                                COMMAND           CREATED         STATUS         PORTS     NAMES
6fc4c458764e   hub.foundries.io/advent2025_2/arduino-matrix-webui   "/app/start.sh"   2 minutes ago   Up 2 minutes             arduino-matrix-webui-arduino-matrix-webui-1
2. Access the Interface: From any computer on the same network, open a browser and navigate to: http://<device-IP>:8000
device:~$ docker logs arduino-matrix-webui-1
3. Start Drawing: Click on the grid squares in your browser. You will see the LEDs on your Arduino UNO Q light up instantly to match your design. Try drawing a smiley face, your initials, or a simple pattern.
Step 5:Removal and Clean up
To prepare for the next part of this series, we should remove this application to keep our device clean. We will use the Web UI again.
- Go back to your Devices page at:
https://app.foundries.io/factories/<FACTORY-NAME>/devices/and select your device
- Click Update tags & apps.
- Move
arduino-matrix-webuifrom Selected back to Available. - Click Apply
The fioup daemon will detect the change and remove the container automatically. You can verify this by running docker ps -a on the device once again; the container should be gone.
Conclusion
In this part, we deployed a sophisticated application that controls a complete LED matrix display through an interactive web interface. We leveraged the same CI/CD workflow as before, but this time we utilized the FoundriesFactory UI for fleet management.
We have demonstrated that with the FoundriesFactory platform we can iterate quickly, test locally, push to the cloud, and deploy complex hardware controls to edge devices string with a simple git push.
In the next part of this series, we will take a major leap forward: integrating Edge Impulse machine learning models. We will build a voice-controlled system that responds to audio commands, combining everything we've learned with AI at the edge.
Resources
For a deeper dive, explore the repository to gain a better understanding of the code: