Finding information and instructions on installing Chromium with graphics hardware acceleration for iMX devices can be difficult.
This blog presents highlights from the work I have done to isolate Chromium with graphics hardware acceleration into a Docker® Compose application.
The main challenges I encountered:
- Starting Point: where to find the initial Chromium implementation that supports hardware acceleration for iMX devices.
- Building Chromium for arm64 inside a container
- Configuring the Docker Compose application to access the GPU
Keep in mind that the work done in this blog is a proof–of–concept. Even though we do not intend to support a Chromium Docker image for iMX devices, I encourage you to still give it a try and come away with your own conclusion.
Starting Point — meta-browser
If you have ever searched for "Chromium for iMX devices supporting graphics acceleration", you probably found the Yocto Project® layer meta-browser, which is, without question, the place with the most advanced Chromium support for iMX. That is where I started, fortunate that at the moment I tried, the Linux microPlatform (LmP) from Foundries.io™ was compatible with the meta-browser layer.
The meta-browser layer has the recipe for the Chromium Ozone Wayland implementation.
If you are not familiar with Wayland, it is intended as a simpler alternative to X. Both Wayland and X are display server protocols that allow your computer to draw the desktop and manage the windows in your display. By the way, you can easily enable Wayland in the Linux microPlatform by setting DISTRO: lmp-xwayland in your FoundriesFactory configuration file. After some research, I found out that by running Chromium Ozone with --in-process-gpu, it uses the Wayland EGL. That being said, Wayland uses the Vivante libraries provided by the imx-gpu-viv recipe enabling the GPU acceleration. Note that this doesn't support video decoding.
During my research, I could not find a good explanation on how
--in-process-gpuworks. I contact Maksim Sisov, one of the main contributor to meta-browser. If you are curious about it, check out what Marksim said about it below:Editor's note: Original explanation edited and rewritten for clarity, length, and style. Original credit and thanks goes to Maksim Sisov.
First, understand that Chromium has a multiprocess architecture. Of these processes, the browser and the GPU are the two major ones.
With Wayland EGL, all GPU commands are issued on the GPU process. Typically, when a frame is ready, buffers are flipped with eglSwapBuffers. However, there is a problem with Wayland —you can not just use the eglSwapBuffers. A Wayland surface is created on the browser process side. A gl surface over on the GPU side must be spawned from the Wayland one.
In multiprocess mode, the GPU process can not access the sandboxed Wayland surface (whereas X11 allows the passing of X11 window handles across processes). Thus,
--in-process-gpuis used.Second thing, Wayland EGL and
--in-process-gpuis actually the fallback path. Note that Chromium runs in a multiprocess mode by default, and remember the above limitations. Chromium uses surfaceless drawing, writing frame data into dumb dmabufs. Handles are then exported and passed to the browser process, which then passes them to Wayland.Doing this requires either (1) the availability of drm render nodes, then either libgbm and zwp_linux_dmabuf, or (2) the wl_drm Wayland protocols.
As iMX doesn't support drm render nodes, one has to use Wayland EGL, which can only be used with
--in-process-gpu.
My first attempt was to make sure that chromium-ozone-wayland worked well when built together with the LmP Wayland distribution.
After trying (long) builds with different configurations and Chromium args, I found the best chromium-ozone-wayland recipe configuration and the Chromium args I should use to get it working.
The next step was to move all of it to a Dockerfile and furthermore to a Docker Compose application.
Building Chromium on Docker
Building Chromium is never easy! It is heavy and takes a painfully long time. Starting a new Docker Image build for arm64 would need a powerful arm64 machine. Luckily, I have access to an arm64 server that I used during the time I develop this image. However, even though the new MacBook comes with an arm64 chip, it is still a long build. For those using FoundriesFactory®, you have the ability to build all containerized applications for x86, arm32 and arm64. With everything built in the cloud, you save time and computing resources.
My starting point for learning how to build Chromium was the Chromium documentation. Instead of choosing the suggested Ubuntu 18.04, I went with Debian Bullseye to make it the same as the container's final stage.
The Dockerfile's first stage is all about building Chromium. The main challenges were:
- Installing all the packages with correct versions.
- Mimicking what the Yocto recipe did to produce this build
Most of the work finding the required packages used in the Dockerfile was guided by trying to build Chromium. Based on that experience, I installed a lot of packages and had to do some hacks to install nodejs 12.x, GCC 10, llvm 13, and ninja.
Next, I brought in the relevant patches from the Yocto Project recipe to the chrome source code and built it with the same args:
gn gen --args='use_cups=false ffmpeg_branding="Chrome" proprietary_codecs=true use_vaapi=false use_gnome_keyring=false use_kerberos=false use_pulseaudio=false use_system_libjpeg=true use_system_freetype=false enable_js_type_check=false is_debug=false is_official_build=true use_lld=true use_gold=false symbol_level=0 enable_remoting=false enable_nacl=false use_sysroot=false treat_warnings_as_errors=false is_cfi=false disable_fieldtrial_testing_config=true chrome_pgo_phase=0 google_api_key="invalid-api-key" google_default_client_id="invalid-client-id" google_default_client_secret="invalid-client-secret" gold_path="" is_clang=true clang_base_path="/usr" clang_use_chrome_plugins=false target_cpu="arm64" max_jobs_per_link="16" use_cups=false ffmpeg_branding="Chrome" proprietary_codecs=true use_vaapi=false use_ozone=true ozone_auto_platforms=false ozone_platform_headless=true ozone_platform_wayland=true ozone_platform_x11=false use_system_wayland_scanner=true use_xkbcommon=true use_system_libwayland=true use_system_minigbm=true use_system_libdrm=true use_gtk=false use_wayland_gbm=false' out/Default/
This leads to a very long build. In my case: 2 hours.
Configuring the Docker Compose Application to Access the GPU
Next, changes are made in the Dockerfile second stage, as well as in the docker-compose.yml file.
It is not uncommon to wonder how a Docker application could access hardware, or if that is even possible. Hopefully I can impart some insights into how the Chromium Docker applications was configured to access the iMX8 GPU.
The first thing that needs to be aligned with the host is the GPU libraries. Usually, the drivers are pre-built. This is the case for imx-gpu-viv and imx-gpu-g2d; you can extract in the correct place and you are good to go. On the other hand, for libdrm-imx you need to understand its respective Yocto recipe, download, patch, compile, and install in your Docker Image.
The second challenge was making sure that the container can access the GPU drivers.
This was done in the docker-compose.yml by sharing the devices and configuring the rules to the cgroups:
    volumes:
    - /run/user/63:/run/user/63
    - /dev/dri:/dev/dri
    - /dev/galcore:/dev/galcore
    device_cgroup_rules:
    - 'c 199:* rmw'
    - 'c 226:* rmw'
Finally, inside the container the user needs permission to access the specified devices. In the second stage of the Dockerfile, you can find commands to add groups video and render as well as adding the user to those groups.
I made the complete source code for this Docker Compose application available on my GitHub.
Testing and Conclusion
Building Chromium is resource heavy and long. If you want to just use it from your Factory, you can point your images to hub.foundries.io/lmp/x-kiosk-imx8:postmerge. Depending on the customization you need, you can also create your own Dockerfile and inherit everything starting from it as well. To test the Docker Compose application, you can get the docker-compose.yml from Foundries.io GitHub repository and add it to your FoundriesFactory.
git clone https://github.com/foundriesio/containers/tree/mp-87
git checkout mp-87
cd containers/x-kiosk-imx8/
docker-compose up


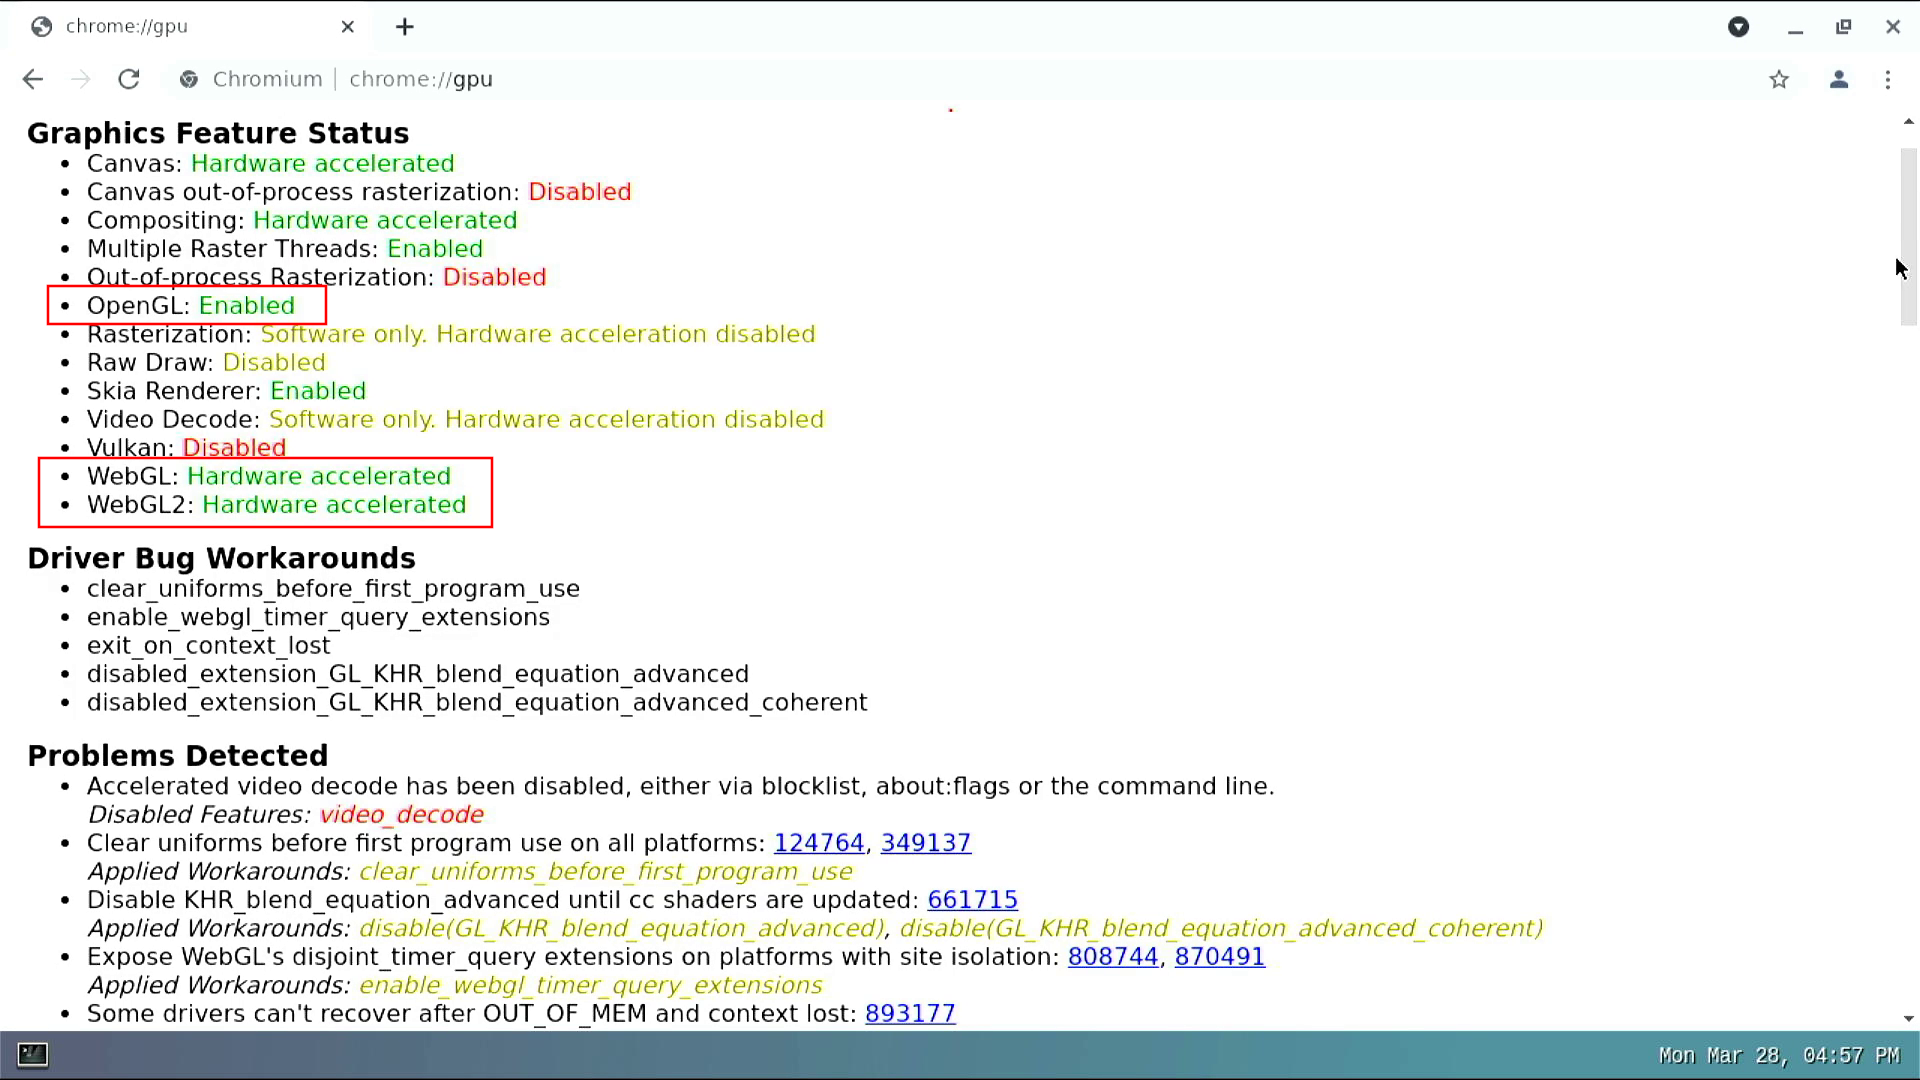
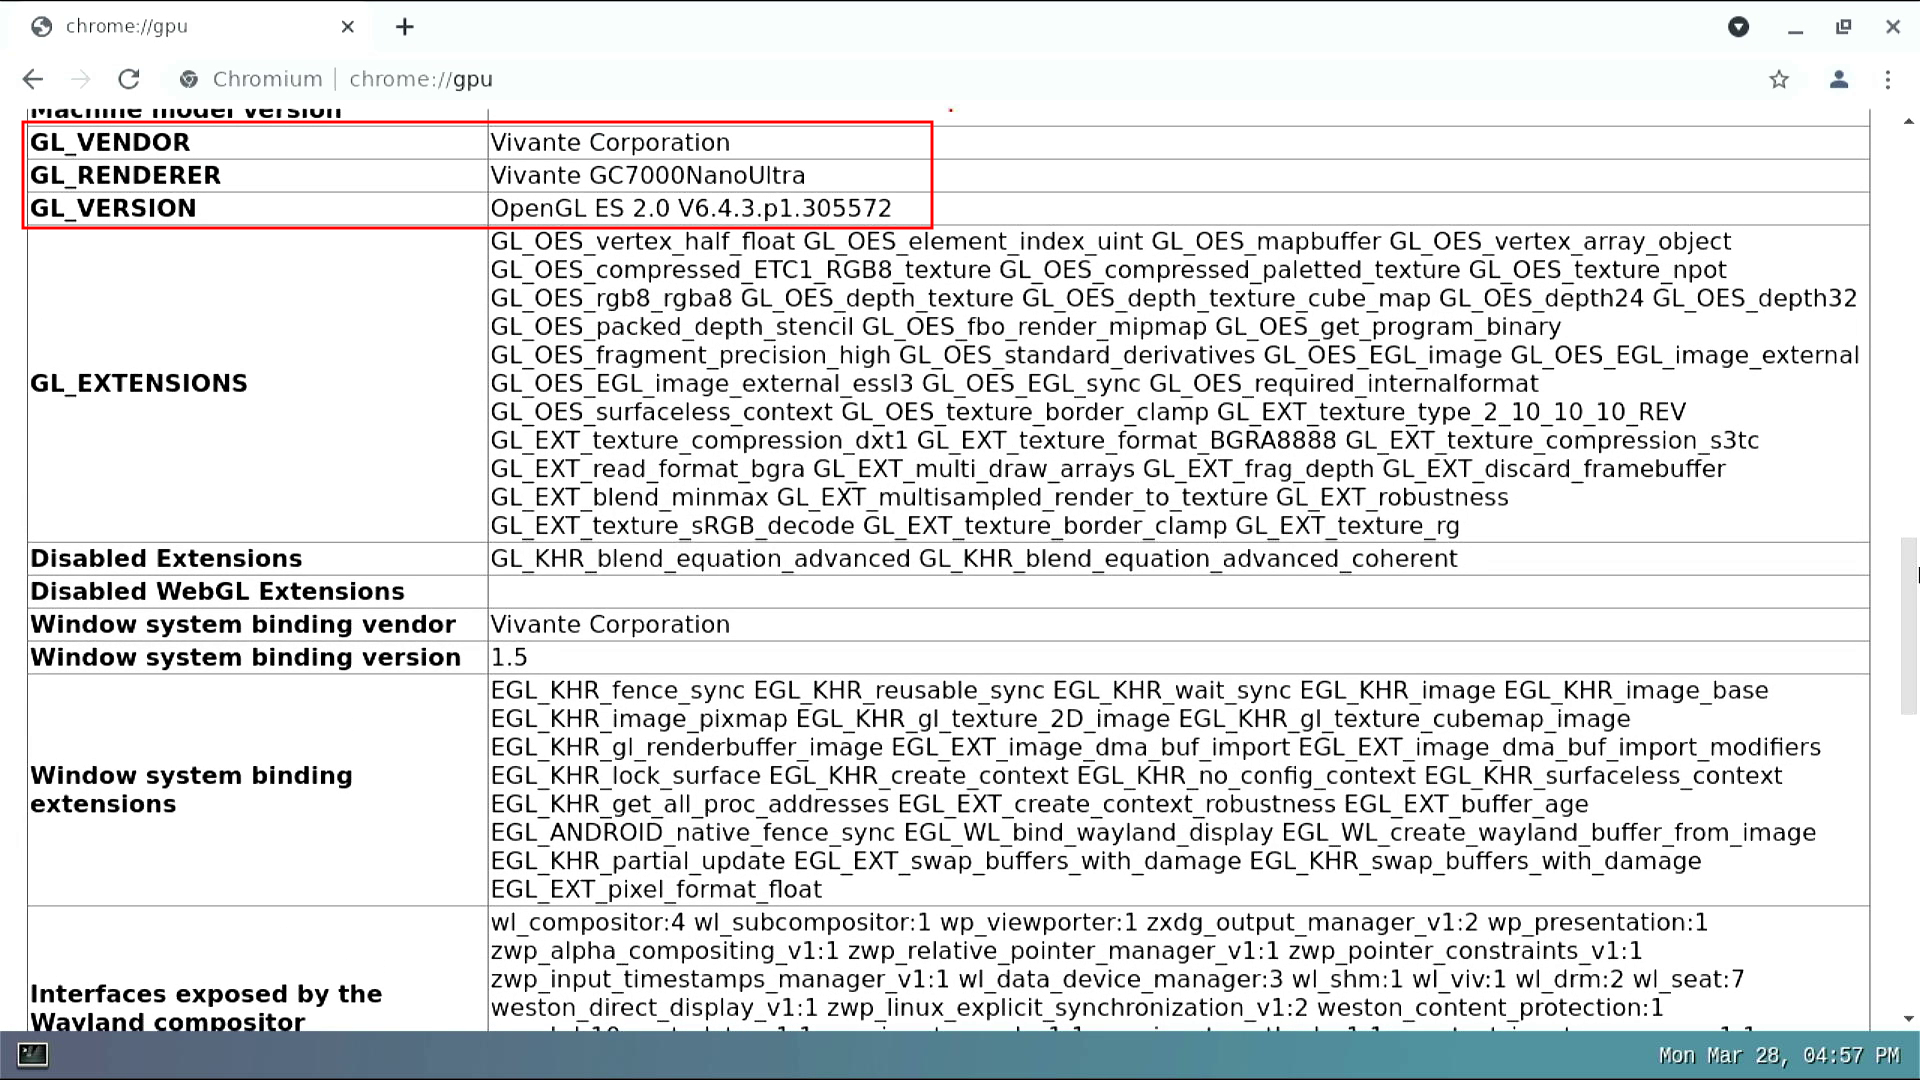
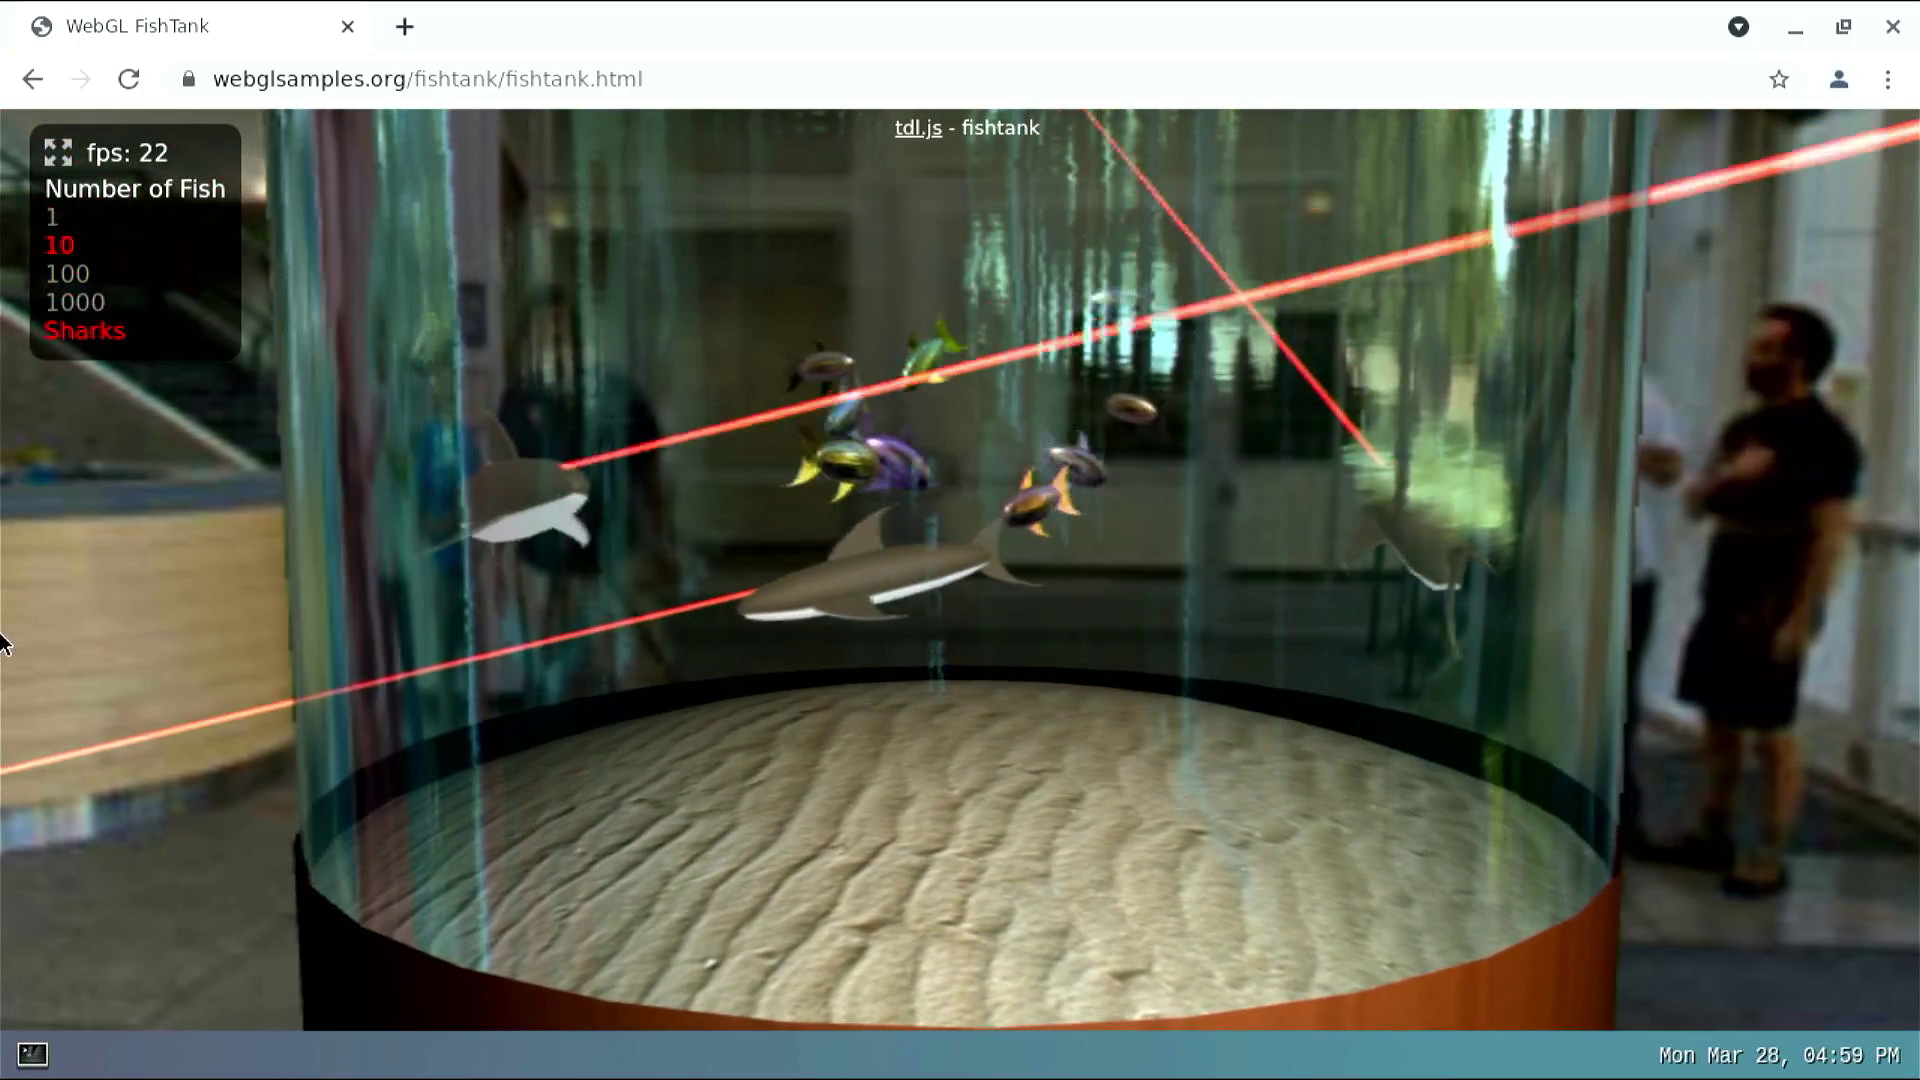
Finally, test the webGL capabilities accessing the URL: https://webglsamples.org/fishtank/fishtank.html


