

Welcome to part thirteen of our AI Powered Christmas Tree Series!
If you have been following along with the series, you should have your very own AI Powered Christmas Tree up and running. With the project completed, the goal of this entry is slightly different. Rather than introducing a new concept or feature to your tree, today we will be discussing how easily your complete application can launch on an entirely new device.
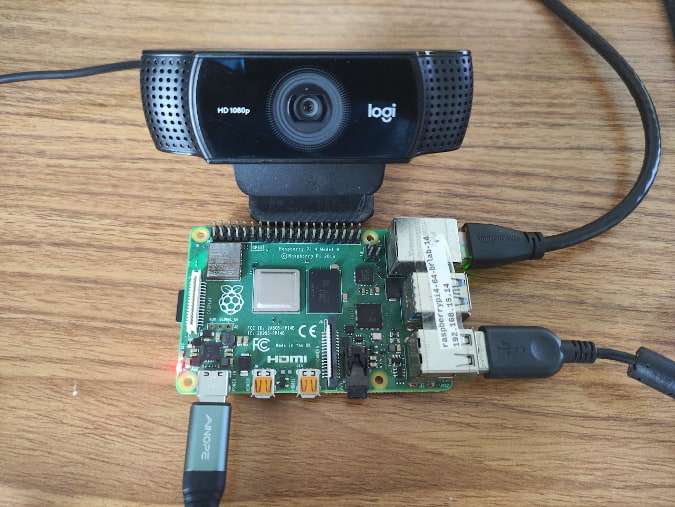
For this, we will be working with a Raspberry Pi 4.
Prerequisites
This is part thirteen of our AI Powered Christmas Tree Series. This entry assumes that you have completed the previous tutorials in the series, and have a completed Docker Compose application.
Please refer back to the overview page for any entries you may have missed.
Working on a New Embedded Device with a Raspberry Pi 4
Over the course of this tutorial series, many people have reached out to us and asked if their christmas-tree.py application could be built on a device other than an Arduino Portenta X8 SoM.
The answer is, of course, yes! The beauty of using the Linux microPlatform™ (LmP) as the base operating system, combined with the Docker Compose application, is the possibility of moving from one device to another with ease.
This tutorial will provide a brief overview of our previous entries, to guide you through building the same AI powered Christmas Tree on a Raspberry Pi 4.
Starting a Free Trial Factory
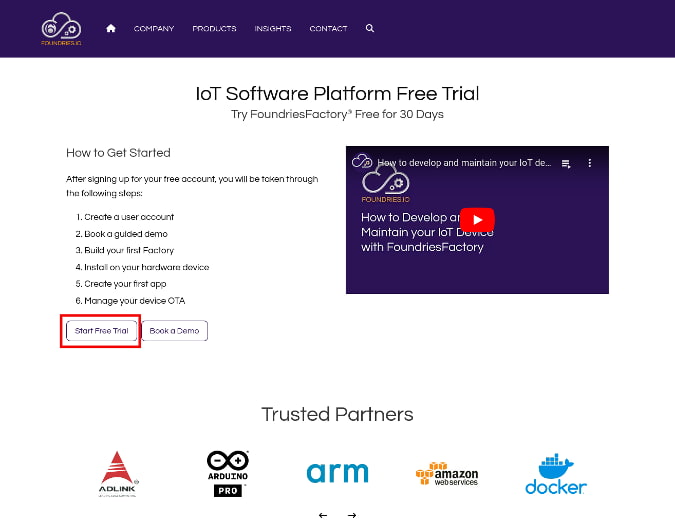
To begin using FoundriesFactory®, start with creating an account.
Signup page:
Complete the signup and create your first Factory with a unique name, selecting Raspberry Pi 4 as the platform.
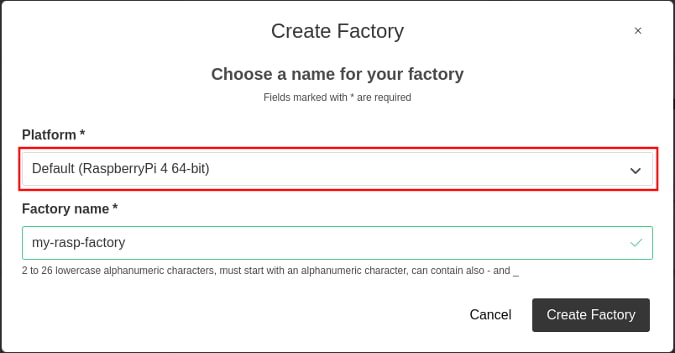
Name your Factory and click the Create Factory button!
You will be redirected to app.foundries.io, where you will meet the Factory Overview Page:
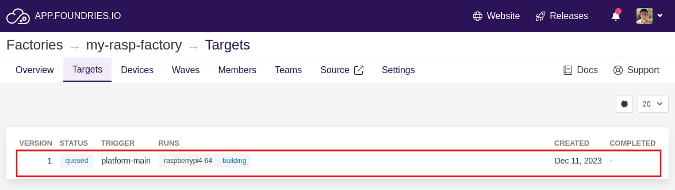
Click on the Targets tab — highlighted in the image above — to see your first Target being generated.
Flashing and Connecting to the Raspberry Pi 4
After the build is complete, and you have Fioctl™ installed and configured, the next step is to flash the Raspberry Pi 4 SD Card with the Target that was just created. We have detailed instructions to do this over on our docs page.
Once the board is booted and running your first Target, it is time to connect to the board. You will log into the board via SSH, but in order to do this, you first need to connect it to the Internet. We recommend that you consult the user manual for your particular device for the best method to do this.
Once your device is connected to your network, you will be able to log into it.
To login via SSH on your host machine, run:
ssh fio@<machine-name>.local
Where fio is the username and <machine-name> is the hostname of your device. The default password is fio.
By default, your device hostname is set to a unique string that specifies the platform chosen during Factory creation (MACHINE). Check Supported Machines for a list of supported platforms and their MACHINE values.
Once you have access to your device’s terminal, you will be able to register it to your Factory.
With the setup complete, you can follow the same methods discussed previously in this series, but this time on the Raspberry Pi 4.
Previous Required Tutorials
On your new Factory, you will need to follow the tutorials below to make sure you have everything you need to create your ML Project on the Raspberry Pi 4:
- Configure your device’s network and add it to your LmP Image:
Adding Static IP or Wifi Config to Your LmP - MQTT is necessary to connect to the Switch Module and communicate between your final application and the Christmas Tree:
Extending the Linux microPlatform - Create your Christmas Tree Docker Compose application and deploy it to the Raspberry Pi 4:
Creating a Docker Compose App to Automatically Power Your AI Christmas Tree On/Off
Make sure you have built the modelfile.eim for your Raspberry Pi 4, and have updated the christmas-tree.py with the right device IP.
Enabling Docker Compose Application
After completing the Docker container build, it is time to enable the application and test:
Make sure you have connected the camera to your Raspberry Pi, and using your host machine to enable the application using Fioctl:
host:~$ fioctl devices config updates --apps christmas-tree <device-name> -f <factory>

Changing apps from: [] -> [christmas-tree]
Testing Your AI Powered Christmas Tree
When the device finishes the over-the-air update, the application will automatically launch.
Check if the Docker Compose app is already running with the command below:
device:~$ docker ps
The output will show the app name:
CONTAINER ID   IMAGE                                             COMMAND                  CREATED         STATUS                                  PORTS     NAMES
9806c0fe4bf5   hub.foundries.io/my-rasp-factory/christmas-tree   "/usr/bin/python3 ch…"   8 seconds ago   Restarting (1) Less than a second ago             christmas-tree-christmas-tree-1
You can now debug your application by following the container log:
device:~$ docker logs -f christmas-tree-christmas-tree-1
The logs will show the Python code output. If any people are detected within view of the camera—and the switch module is correctly connected to the MQTT broker running on your device—it will turn on and off the Christmas Tree lights!
This is an example output of the christmas-tree app running on an embedded device:
Initializing camera at port 1, FPS 5
Camera V4L2 (480.0 x 640.0) in port 1 selected.
Send `OFF` to topic `cmnd/switch/POWER1`
Christmas tree turned off
Current person detection count: 0
Current person detection count: 0
Current person detection count: 0
Current person detection count: 0
Current person detection count: 0
Current person detection count: 0
Current person detection count: 0
Current person detection count: 0
Current person detection count: 1
Current person detection count: 1
Current person detection count: 2
Two or more people detected
Send `ON` to topic `cmnd/switch/POWER1`
Christmas tree turned on
Current person detection count: 1
Current person detection count: 2
Current person detection count: 3
Current person detection count: 4
Current person detection count: 5
Current person detection count: 6
Current person detection count: 7
...
Recap and Conclusion
In this tutorial, you have run the same application that the previous tutorials walked you through creating and testing for the Portenta x8, this time on a Raspberry Pi 4.
FoundriesFactory has streamlined the process of changing your device, because you have used the same distribution —the Linux microPlatform—and abstracted your application with a Docker container. The cloud based CI/CD systems build artifacts for your project, and distributes them via OTA updates to connected devices.
This architecture helps accelerate your project’s development, and gets you prepared for the future, which in commercial projects can often involve the need to change your current device’s SOC.
Continue Building Ai-Powered Christmas Tree
If you are interested in our entire 14-part series on how to build an AI powdered Christmas tree, browse through each section below. Each part brings you closer to mastering your build:
- Part 1: Your First FoundriesFactory AI-Powered Christmas Tree
- Part 2: Configure Network and Wi-Fi
- Part 3: A Yocto & Linux Tutorial for Building An AI-Powered Christmas Tree
- Part 4: Linux MicroPlatform (lmP) Config Tutorial for AI-Powered Christmas Tree
- Part 5: Modify & Extend Linux MicroPlatform for AI-Powered Christmas Tree
- Part 6: Using a MQTT Switch Module on Arduino Portenta X8
- Part 7: Creating a Shell Script Application and Adding to Linux microPlatform™ (MQTT)
- Part 8: Connecting the Web Camera Interface with Docker Container
- Part 9: Using Edge Impulse AI to Recognize Human Presence With Arduino Portenta X8
- Part 10: Enhancing the Image Detection Capabilities of our AI Powered Christmas Tree
- Part 11: Writing a Python App to Turn Our Christmas Tree On/Off Using AI
- Part 12: Creating a Docker Compose App to Automatically Power Your AI Christmas Tree On/Off
- Part 13: Running Docker Compose Application on a Raspberry Pi 4 to Power Our AI Christmas Tree
- Part 14: Managing Multiple SoM Platforms in the Same Factory